

Advancing dApp development with Hardhat Indexing: A Game-Changer for Ethereum Devs
With Subsquid

Software Engineering, Blockchain, Basket, Science 🇮🇹🇬🇧🇫🇷 If I have seen further it is by standing on the shoulders of giants
Summary
Blockchain data indexing helps dApp developers to build better, more performant decentralized applications, ultimately improving the user experience.
One of the most important ways they do this is by decoupling of smart contract development from frontend and, when needed, backend development.
But traditionally, there has been a lack of solutions to help local development in this sense, no one thought about indexing a local EVM node…
But Subsquid did think of it
And this article explains how.
Having an indexing middleware from the start of a project, when no contracts have been deployed on-chain yet, means developers can build the smart contract locally (just as they do now), and index the local node as well. This enables early development of frontend as well, with reduced coupling to the smart contract, or its blockchain.
A smoother, better development experience leads to better dApps, which can be tested earlier and better, before deploying the smart contract on-chain (not even on testnet!).
Introduction
A little over a month ago, I have written an article on how to index a development Ethereum node, using Subsquid and the Ganache/Truffle suite.
I have been positively surprised by the appreciation of the developer community over this very useful feature offered by Subsquid's framework, and over the article itself.
The inspiration for the article came from a project I had built a little over a month earlier, for which I wrote a different article. In this initial project, I was actually using a Hardhat local node for my smart contract development. I decided to switch to Truffle for the final article, because it had a more intuitive demo contract, and because the command line tool made it easier to create manual transactions.
In a quest to provide developers with as many options possible, as much material possible and the maximum number of examples, I decided to revisit this material, and write a guide on how to index a Hardhat node.
The project discussed in this article is available in this repository:
The project
If you haven’t already, you need to install Subsquid CLI first:
npm i -g @subsquid/cli@latest
In order to create a new squid project, simply open a terminal and launch the command:
sqd init local-evm-indexing -t evm
Where local-evm-indexing is the name we decided to give to our project, you can change it to anything you like. And -t evm specifies what template should be used and makes sure the setup will create a project from the EVM-indexing template.
1. Create a Hardhat project
In order to start working with Hardhat, it’s necessary to install the package.
In a console window, from the squid project’s root folder, launch:
npx hardhat
Note: If you get an error referencing your
README.mdor other files, delete them and runnpx hardhatagain. Alternatively, choose a different folder, but doing so will slightly diverge from this tutorial.
And follow the guided initialization process. For the purpose of this tutorial, I have chosen a TypeScript project and left other choices as default.
Configure Hardhat automining (optional)
Then, open the hardhat.config.ts (the file extension will be .js if you selected a JavaScript file in the previous step), and add this in the HardhatUserConfig object (or the module.exports for a JavaScript file):
const config: HardhatUserConfig = {
  defaultNetwork: "hardhat",
  networks: {
    hardhat: {
      chainId: 1337,
      mining: {
        auto: false,
        interval: [4800, 5200]
      }
    },
  },
  solidity: "0.8.17",
};
The mining configuration will continuously mine blocks, even if no events or transactions are executed, it can be useful for debugging. You can read more about it on hardhat's official documentation.
Finally, launch the node with this command:
npx hardhat node
2. Deploy the contract (and generate transactions)
Hardhat ships with its own demo contract, called Lock, but I found myself more at ease with the MetaCoin contract from Truffle, which part of the reason why the first article uses Ganache and Truffle as an example.
In order to better compare the setup between the two articles and the two options (Ganache and Hardhat), I am going to continue using the MetaCoin contract in this article.
My suggestion is to just copy the Solidity source code from the repository and paste the two files in the contracts folder of the Hardhat project.
The next thing to do is change the deploy.ts (or .js, depending on how you initialized the project) script, located in the scripts folder. It needs to be edited in order to deploy our the ConvertLib library, as well as our ne. MetaCoin contract.
The hardhat-ethers plugin adds the ethers.js library to the Hardhat node, making it possible to use its functionalities. It's possible to use it to deploy the contract, but since our goal is to create transactions, we can also add some code to do that as well.
It should look like this:
import { ethers } from "hardhat";

async function main() {

  const ConvertLib = await ethers.getContractFactory("ConvertLib");
  const convertLib = await ConvertLib.deploy();

  await convertLib.deployed();

  const MetaCoin = await ethers.getContractFactory("MetaCoin", {
    libraries: {
      ConvertLib: convertLib.address,
    },
  });
  const metaCoin = await MetaCoin.deploy();

  let instance = await metaCoin.deployed();

  console.log(`MetaCoin  deployed to ${metaCoin.address}`);
  let accounts = await ethers.getSigners()
  console.log(`There are a total of ${accounts.length} accounts`)
  await instance.sendCoin(accounts[1].address, 10, {from: accounts[0].address})
  console.log(`Sent 10 coin from ${accounts[0].address} to ${accounts[1].address}`)
  await instance.sendCoin(accounts[2].address, 10, {from: accounts[0].address})
  console.log(`Sent 10 coin from ${accounts[1].address} to ${accounts[2].address}`)
  await instance.sendCoin(accounts[3].address, 10, {from: accounts[0].address})
  console.log(`Sent 10 coin from ${accounts[1].address} to ${accounts[3].address}`)
  await instance.sendCoin(accounts[4].address, 10, {from: accounts[0].address})
  console.log(`Sent 10 coin from ${accounts[1].address} to ${accounts[3].address}`)
}

// We recommend this pattern to be able to use async/await everywhere
// and properly handle errors.
main().catch((error) => {
  console.error(error);
  process.exitCode = 1;
});
Then open a different terminal (the first one is occupied by the running node), and run this command to deploy the contract:
npx hardhat run scripts/deploy.ts --network localhost
Note: please pay attention to the address of the deployed
MetaCoinsmart contract, as it will be used in the indexer logic section below, and it may vary from the one shown there.
The next sections about the Subsquid Archive and the development of the Squid indexer, are actually unchanged from the original article, and this is not only on purpose, but it's actually the point:
We have changed the tool running the local Ethereum node, but the indexing part stays the same
Hardhat offers the ability to interact with the running blockchain node through a console. If you don’t want to generate transactions on deployment, you can open the console and run the necessary code later on.
Using it is as easy as running the command:
npx hardhat console
Archive Docker image
In order to index the local Ethereum node, we need to use a pre-built Docker image of Subsquid’s Ethereum Archive. You can do it, by creating a docker-compose.archive.yml file (I have added one in the archive folder) and paste this:
version: "3"

services:
  worker:
    image: subsquid/eth-archive-worker:latest
    environment:
      RUST_LOG: "info"
    ports:
      - 8080:8080
    command: [
            "/eth/eth-archive-worker",
            "--server-addr", "0.0.0.0:8080",
            "--db-path", "/data/db",
            "--data-path", "/data/parquet/files",
            "--request-timeout-secs", "300",
            "--connect-timeout-ms", "1000",
            "--block-batch-size", "10",
            "--http-req-concurrency", "10",
            "--best-block-offset", "10",
            "--rpc-urls", "http://host.docker.internal:8545",
            "--max-resp-body-size", "30",
            "--resp-time-limit", "5000",
    ]
    # Uncomment this section on Linux machines.
    # The connection to local RPC node will not work otherwise.
    # extra_hosts:
    #   - "host.docker.internal:host-gateway"
    volumes:
      - database:/data/db
volumes:
  database:
Now, let’s open the commands.json file, and add archive-up and archive-down to the list of commands. It's not mandatory, but these shortcuts are quicker to type, and easier to remember! 😅
{
    "$schema": "https://cdn.subsquid.io/schemas/commands.json",
    "commands": {
      // ...
      "archive-up": {
        "description": "Start a local EVM Archive",
        "cmd": ["docker-compose", "-f", "archive/docker-compose.archive.yml", "up", "-d"]
      },
      "archive-down": {
        "description": "Stop a local EVM Archive",
        "cmd": ["docker-compose", "-f", "archive/docker-compose.archive.yml", "down"]
      },
      // ...
    }
  }
Then start the service by opening the terminal and launching the command:
sqd archive-up
Squid development
It’s finally time to index the smart contract events we generated earlier, with Subsquid’s SDK. Using the contract’s ABI and contract address from previous steps.
If you want to know more about how to develop your squid ETL, please head over to the dedicated tutorial on Subsquid’s official documentation.
Schema
Since we are using MetaCoin contract as a reference, so we'll build a schema that makes sense with respect to the data it produces.
type Transfer @entity {
  id: ID!
  block: Int!
  from: String! @index
  to: String! @index
  value: BigInt!
  txHash: String!
  timestamp: BigInt!
}
And now let’s generate the TypeScript model classes for this schema. In a console window, from the project’s root folder, type this command:
sqd codegen
ABI facade
We also need to generate TypeScript code to interact with the contract, and for that, we need the contract’s ABI.
Similarly to Truffle, Hardhat generates that when it compiles the Solidity code, and puts the ABI under artifacts/contracts(while Truffle does the same under build/contracts/). So let's use Subsquid CLI tools and in a console window, from the project’s root folder, type this command:
sqd typegen artifacts/contracts/MetaCoin.sol/MetaCoin.json
Processor configuration
Let’s open the processor.ts file, and make sure we import the new Transfer model, as well as the ABI facade. From this, we are only going to import the events object.
import { Transfer } from './model';
import { events } from './abi/MetaCoin';
Because we want to index our local Archive, the data source of the processor class needs to be set to the local environment.
I have also created a constant for the address of the contract we deployed, and always remember to toLowerCase() your contract addresses, to avoid issues.
Note: This is where you need to use the contract address that has been logged by the
deploy.tsscript.
And finally, we want to configure the processor to request data about the Transfer event:
// ...
const contractAddress = "0x9fE46736679d2D9a65F0992F2272dE9f3c7fa6e0".toLowerCase()
const processor = new EvmBatchProcessor()
  .setDataSource({
    chain: "http://localhost:8545",
    archive: "http://localhost:8080",
  })
  .addLog(contractAddress, {
    filter: [[events.Transfer.topic]],
    data: {
      evmLog: {
        topics: true,
        data: true,
      },
      transaction: {
        hash: true,
      },
    },
  });
// ...
You can also use environment variables, just like shown in this complete end-to-end project example. This will make sure the project will stay the same, and only configuration files containing environment variables will be changed, depending on the deployment.
Process events
We now need to change the logic of the processor.run() function, to apply our custom logic.
In order to process Transfer events, we need to "unbundle" all the events our processor receives from the Archive in a single batch, and decode each one of them.
The best practice in this scenario is to use an array as a temporary data storage and save all the processed transfers at the end, in another batch operation. This will yield better performance, as data storages such as the Postgres database we are using at the moment, are optimized for this. The code should look like this:
processor.run(new TypeormDatabase(), async (ctx) => {
  const transfers: Transfer[] = []
  for (let c of ctx.blocks) {
    for (let i of c.items) {
      if (i.address === contractAddress && i.kind === "evmLog"){
        if (i.evmLog.topics[0] === events.Transfer.topic) {
          const { _from, _to, _value } = events.Transfer.decode(i.evmLog)
          transfers.push(new Transfer({
            id: `${String(c.header.height).padStart(10, '0')}-${i.transaction.hash.slice(3,8)}`,
            block: c.header.height,
            from: _from,
            to: _to,
            value: _value.toBigInt(),
            timestamp: BigInt(c.header.timestamp),
            txHash: i.transaction.hash
          }))
        }
      }
    }
   }
   await ctx.store.save(transfers)
});
Run and test
It’s finally time to perform a full test. Let’s build the project first:
sqd build
Then, we need to launch the database Docker container, by running the command:
sqd up
Next, we need to remove the database migration file that comes with the template, and generate a new one, for our new database schema:
sqd migration:clean
sqd migration:generate
And we can finally launch the processor:
sqd process
In order to test our data, we can launch the GraphQL server as well. In a different console window, run:
sqd serve
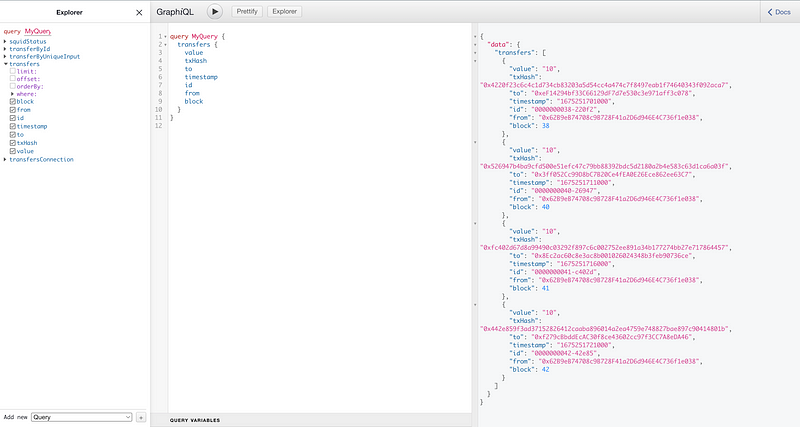
And perform a test query:
query MyQuery {
  transfers {
    block
    from
    id
    timestamp
    to
    txHash
    value
  }
}
Conclusions
What I wanted to show with this article is that thanks to Subsquid, it is possible to have an indexing middleware at the same time as developing smart contract(s) for a project.
Developers can build their dApp by building their smart contract locally, deploying it on a local node, and indexing that local node with a squid. This leads to a development and testing cycle with much tighter iterations.
Furthermore, since the indexing middleware is present from the start, fewer changes have to be made (just changing the chain, address and the contract address itself).
If you found this article interesting, and you want to read more, please follow me and most importantly, Subsquid.
Subsquid socials: Website | Twitter | Discord | LinkedIn | Telegram | GitHub | YouTube


