Table of contents
Last year I curated a series of videos for a partner project to introduce Subsquid and explain its core concepts, starting from the basics, up to some less-known features. With the new year, I decided to rewrite parts of the videos, re-adapt and re-record them to the latest changes in the SDK and create a new series that we decided to call Subsquid Academy.
Introduction
In the previous lesson, we discussed what Subsquid is and why you should be using it.
In this article, we are going to discuss Aquarium, the hosting service provided by Subsquid.
At the end of the last lesson, we had our project running locally, but that's not very useful if we want to use it on a web page. To do so, you'd have to host it with a centralized cloud provider and maintain it yourself.
Instead, you can just deploy on Aquarium with a few commands from the command line and have your project publicly available in no time.
In Aquarium, you'll be able to find squids developed by the Subsquid team, as well as the community, and host your own projects as well. We think this is a great way to remove obstacles to dApp development, by taking care of deployment and maintenance.
In this first section, I am going to show you the app, and explain the sections and its uses. Then, I am going to show you how to publish the project from the previous Lesson, using Subsquid's command line tools.
Let's jump ahead and start exploring Aquarium.
Exploring Aquarium
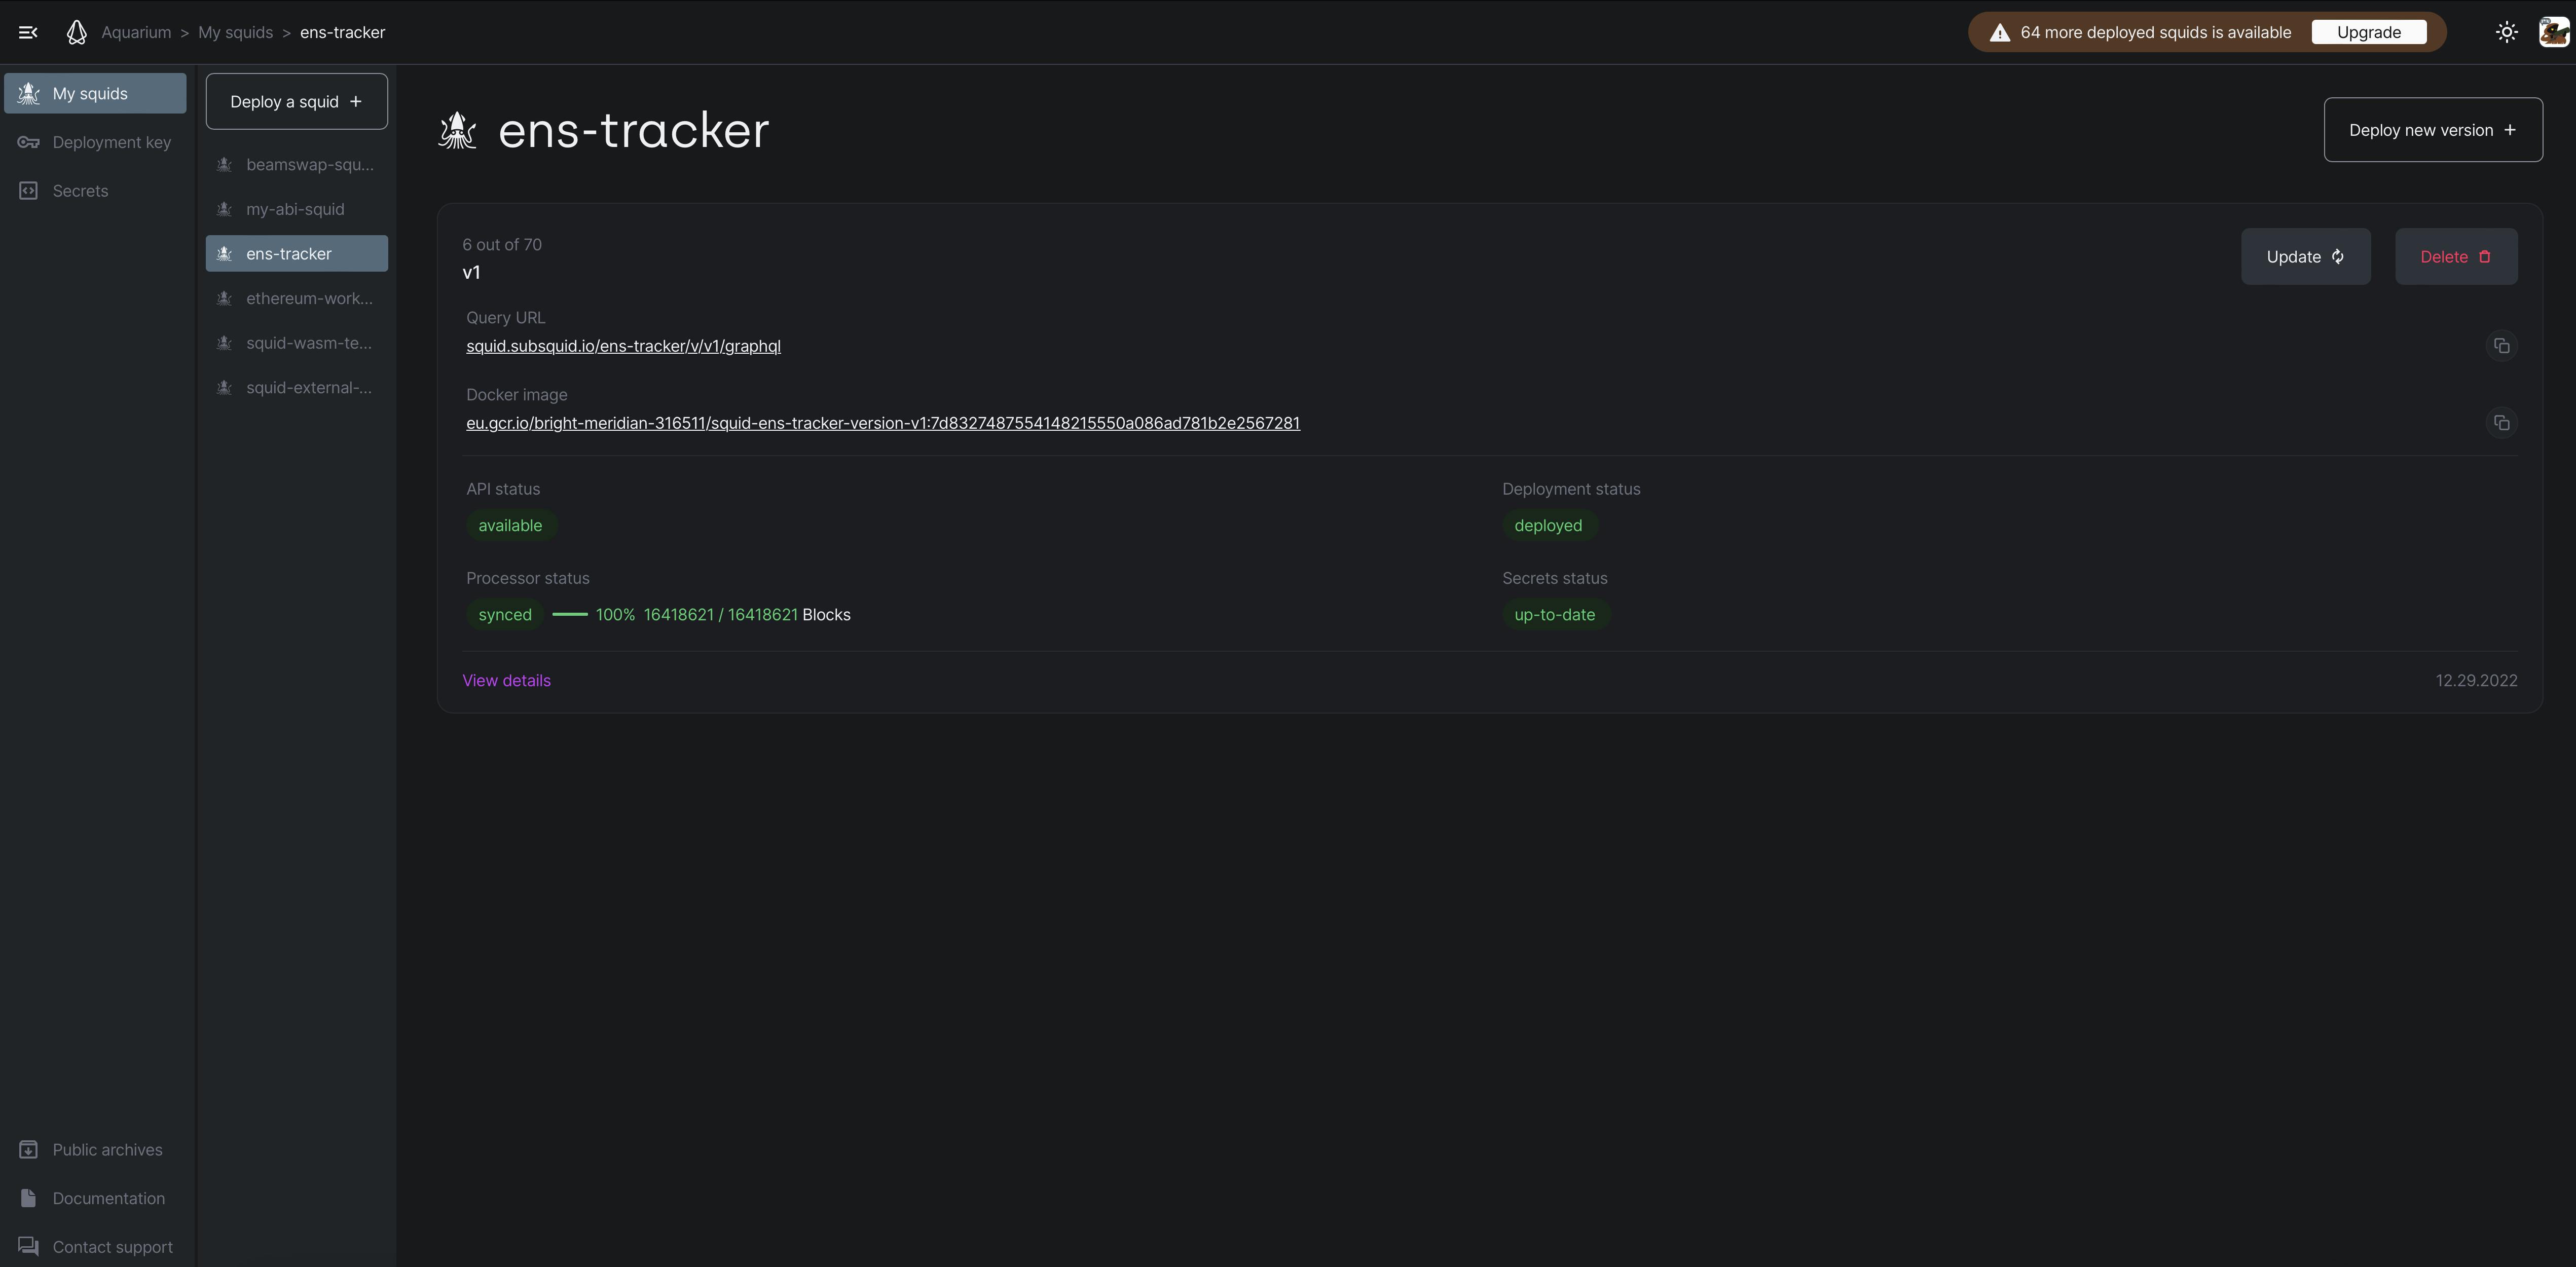
Let's open the browser on app.subsquid.io, if you are logged in with your GitHub credentials, you should see your avatar at the top-right of this page and you should be able to see the management page of one of your squids. Here you can see the status, and access the logs of one of your deployed squids, which we'll see in a second, you can also create a new version, or create a new squid entirely.
Let's create a new squid by clicking on the "Deploy a squid" button.
This is showing us a procedure and provides us with a couple of commands, which we are going to execute in a second.
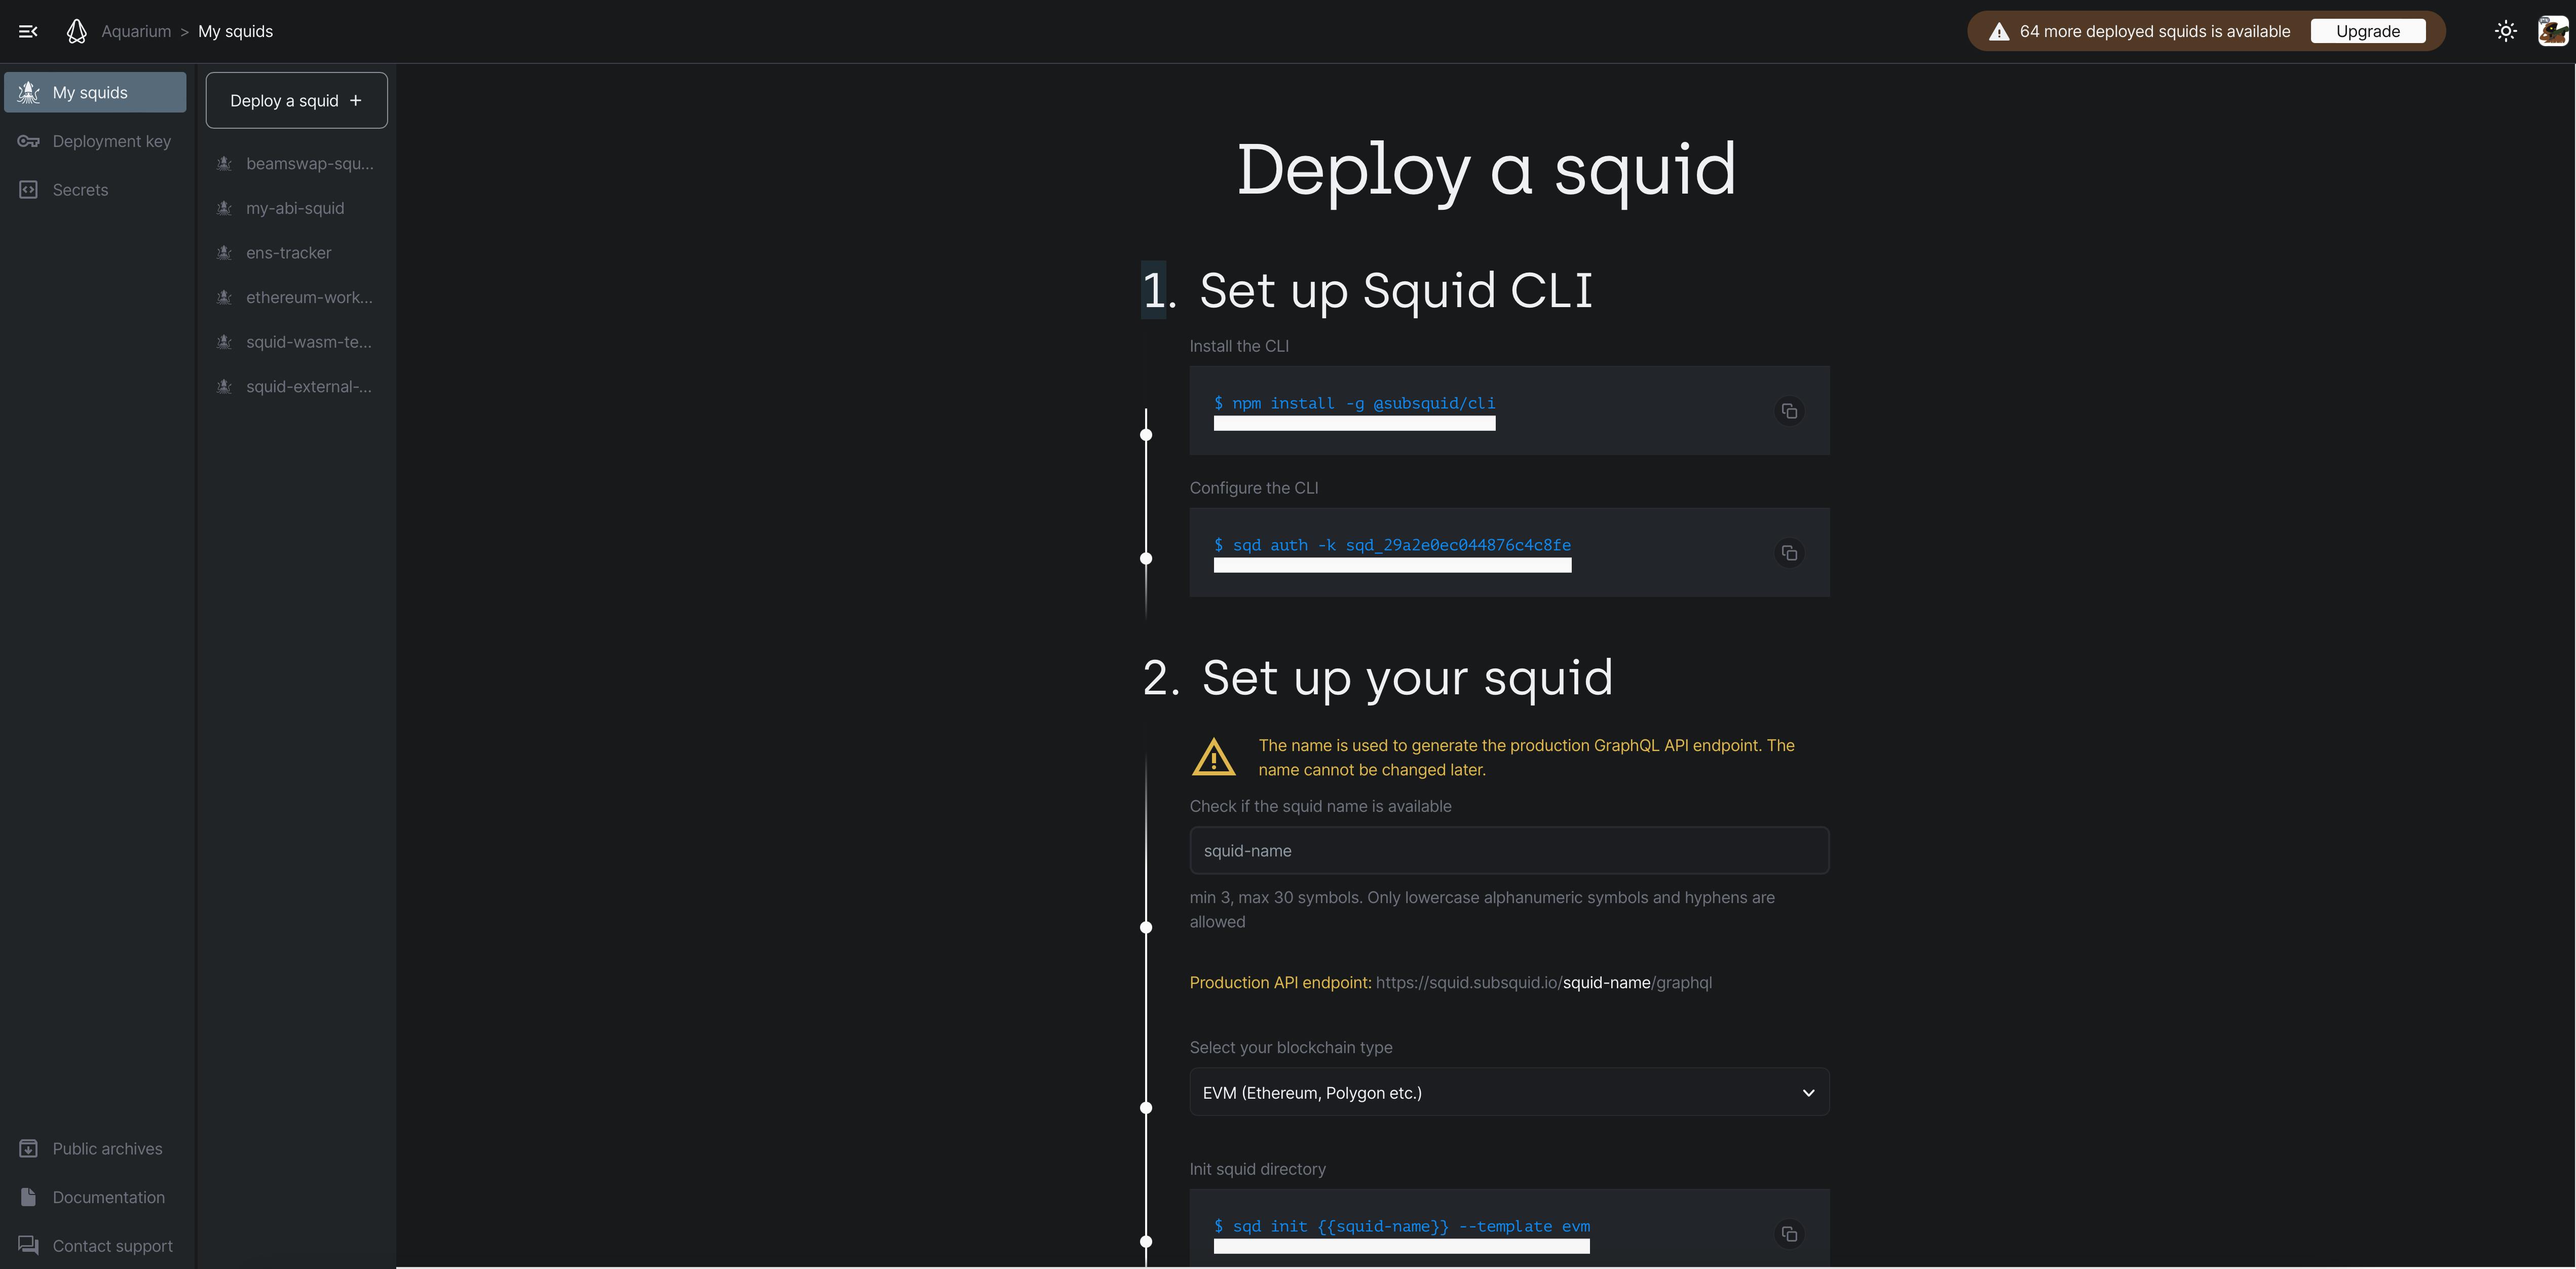
It then asks us to provide a name and choose a blockchain type, because the latest version of the CLI is able to create a project for you: there is no need to start from the template project as we did in the previous lesson.
For this reason, since we already have a project, we are actually going to skip step number 2 for this article. We need to talk, however, about a key component of the deployment process: the manifest file.
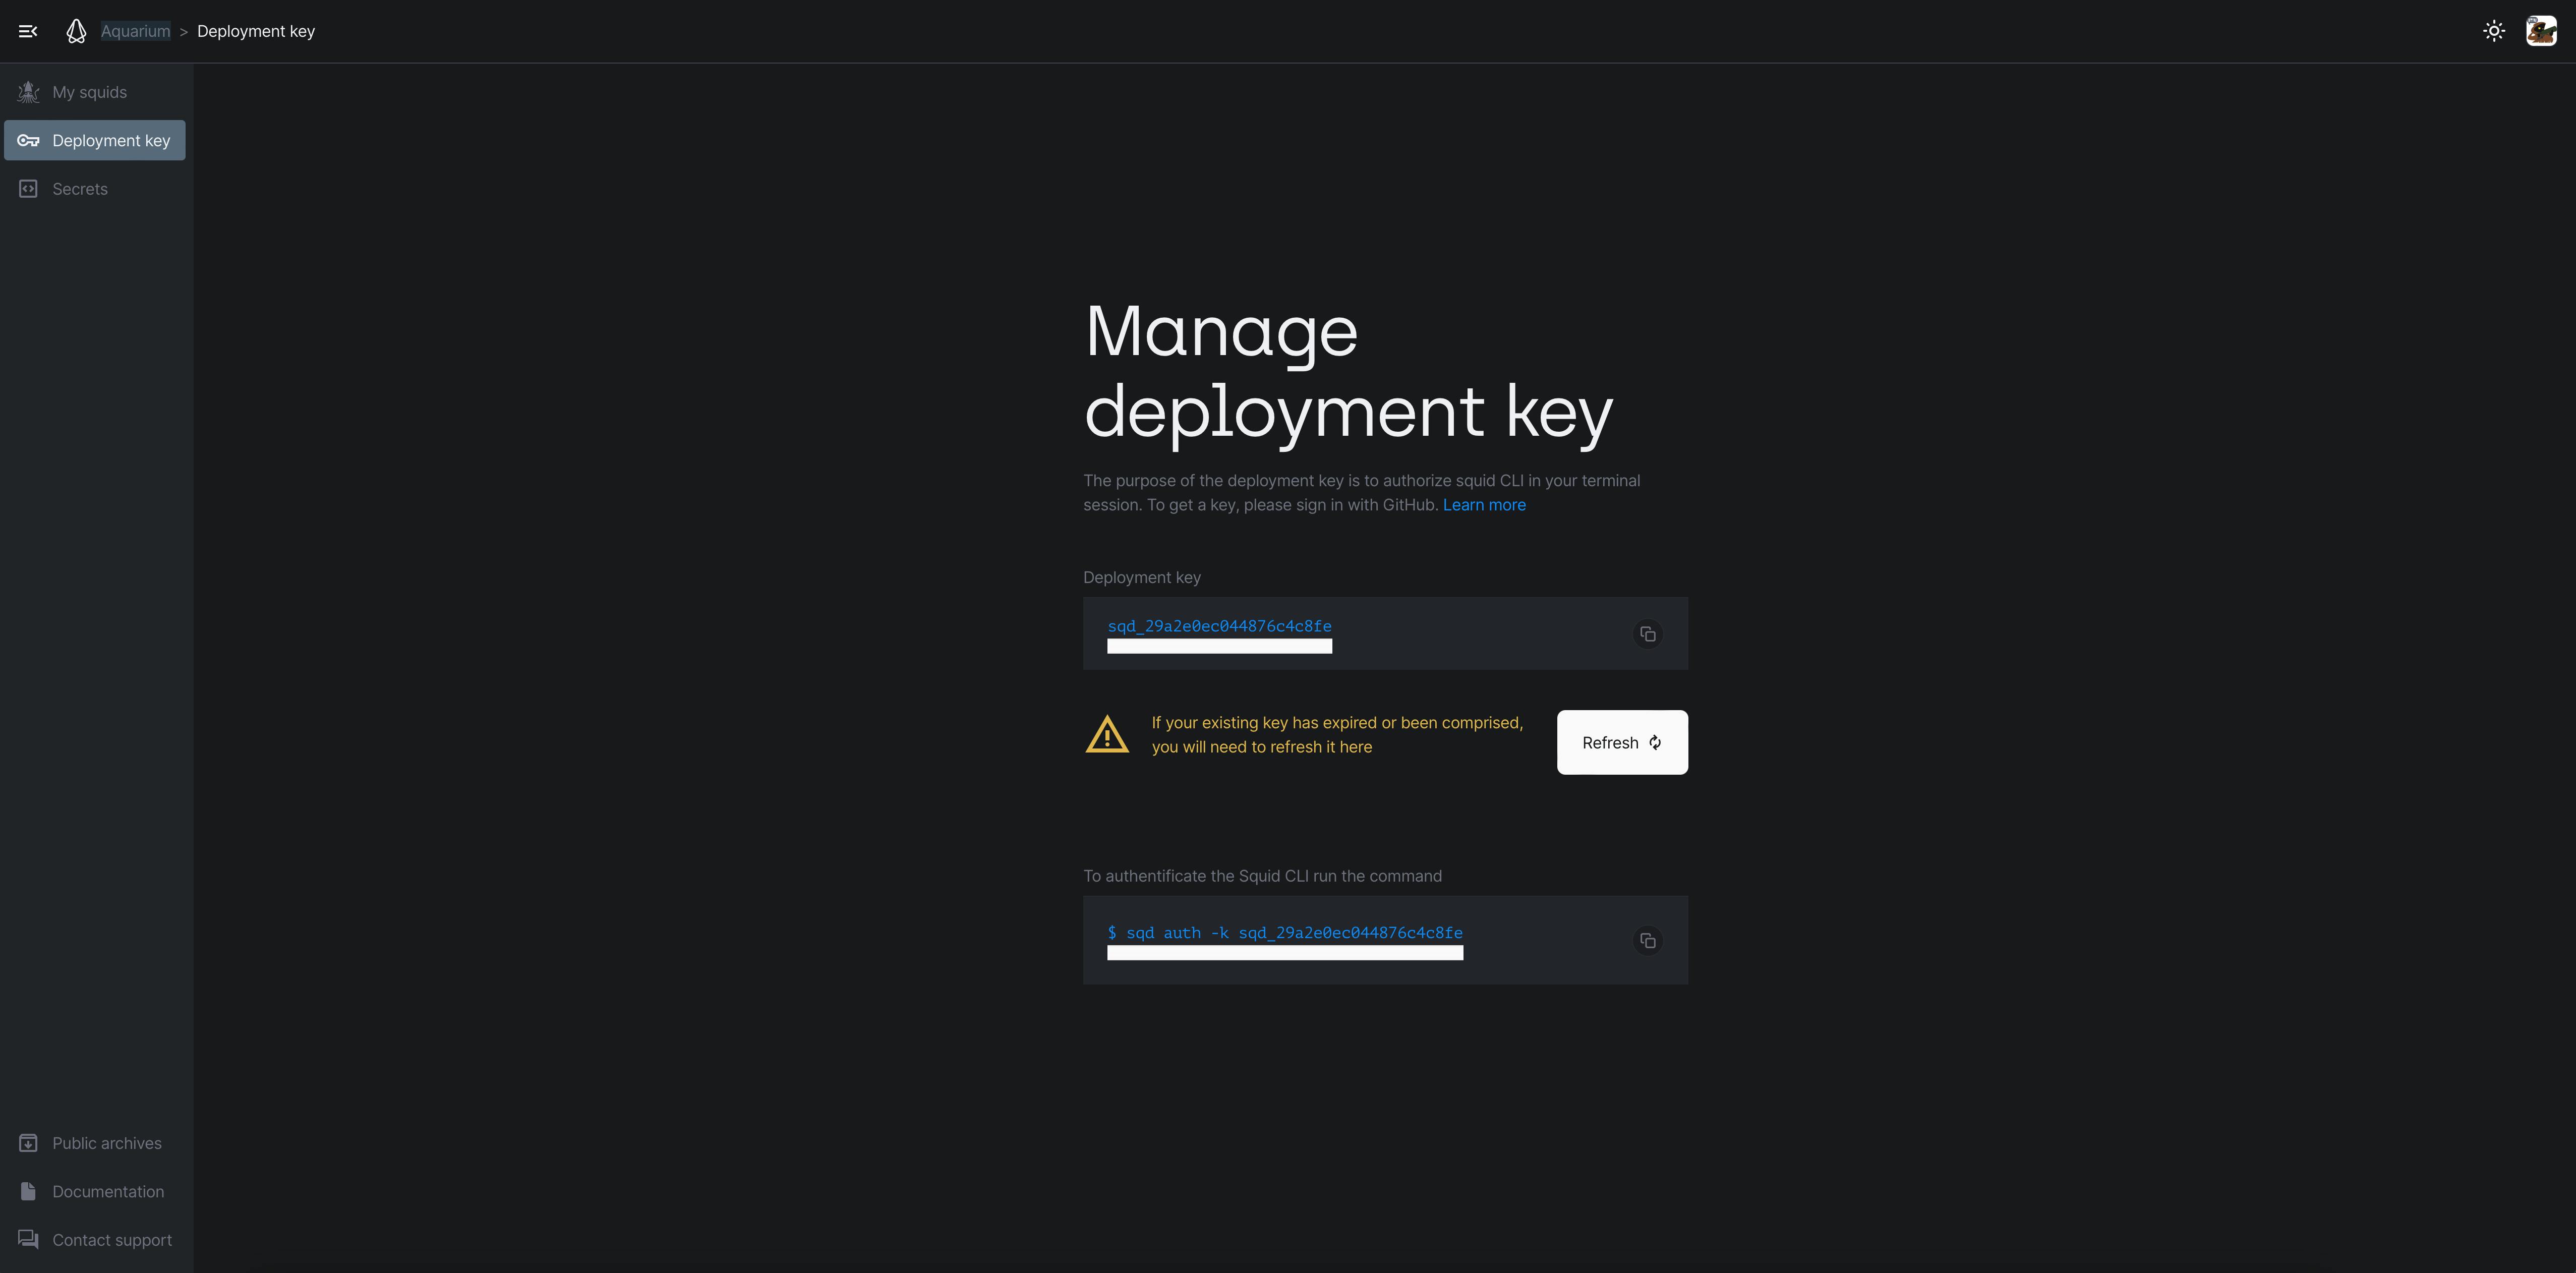
Before we go back to the IDE, I wanted to highlight one more thing: do not share your deployment key as it will allow anyone to deploy or remove squids under your account.
If you happen to share it, like I am doing now, just visit the Deployment Key page and click on "Refresh". A new key will be generated and any sessions using the old one will be logged out.
How to publish a squid to Aquarium
Let's copy the first command of step number 1 and in a terminal window, paste and execute the command:
npm install -g @subsquid/cli
This will install Subsquid's Command Line tools library globally. Let's then copy and paste in a terminal the second command from step number 1:
sqd auth -k sqd_<your-deployment-key-here>
We just used the sqd command line tool, which is part of the Subsquid SDK, and you can learn how to use it with the help argument, let's do it right now:
sqd --help
It will output:
squid cli tool

VERSION
  @subsquid/cli/2.0.2 darwin-arm64 node-v16.17.0

USAGE
  $ sqd [COMMAND]

TOPICS
  secrets  Manage account secrets. The secrets are exposed as environment variables, and are accessible to all the squids deployed by the current Aquarium account.

COMMANDS
  auth      Authenticate to deploy and manage squids 🦑
  deploy    Deploy a new or update an existing squid version
  help      Display help for sqd.
  init      Create a squid from template
  kill      Remove a squid or a squid version
  logs      Fetch squid logs
  ls        List squids and squid versions
  prod      Assign a squid version to the production endpoint
  redeploy  Restart a squid version
  rm        Remove a squid or a squid version
  whoami    Return user and context
We can create, list, remove, deploy, update and monitor the logs of our squids
Specifically, for the purpose of this lesson, we are interested in the sqd deploy command. To have a better understanding, let's take a look at the "Deploy a squid" page of the documentation.
Earlier I mentioned there's an important piece in our project, and this is the Manifest. This is a new file that allows us to configure how the squid should be built and customized. The dedicated documentation page provides an example, but there is also a migration guide, for situations where a project was created without a Manifest file.
We can go back to our IDE, open the squid.yaml file, and change the name, at least.
manifestVersion: subsquid.io/v0.1
name: ens-tracker
version: 1
description: |-
  A squid ETL to index ENS tokens, for Subsquid Academy
build:
deploy:
  secrets:
    - RPC_ENDPOINT
  addons:
    postgres:
  processor:
    cmd: [ "node", "lib/processor" ]
  api:
    cmd: [ "npx", "squid-graphql-server", "--dumb-cache", "in-memory", "--dumb-cache-ttl", "1000", "--dumb-cache-size", "100", "--dumb-cache-max-age", "1000" ]
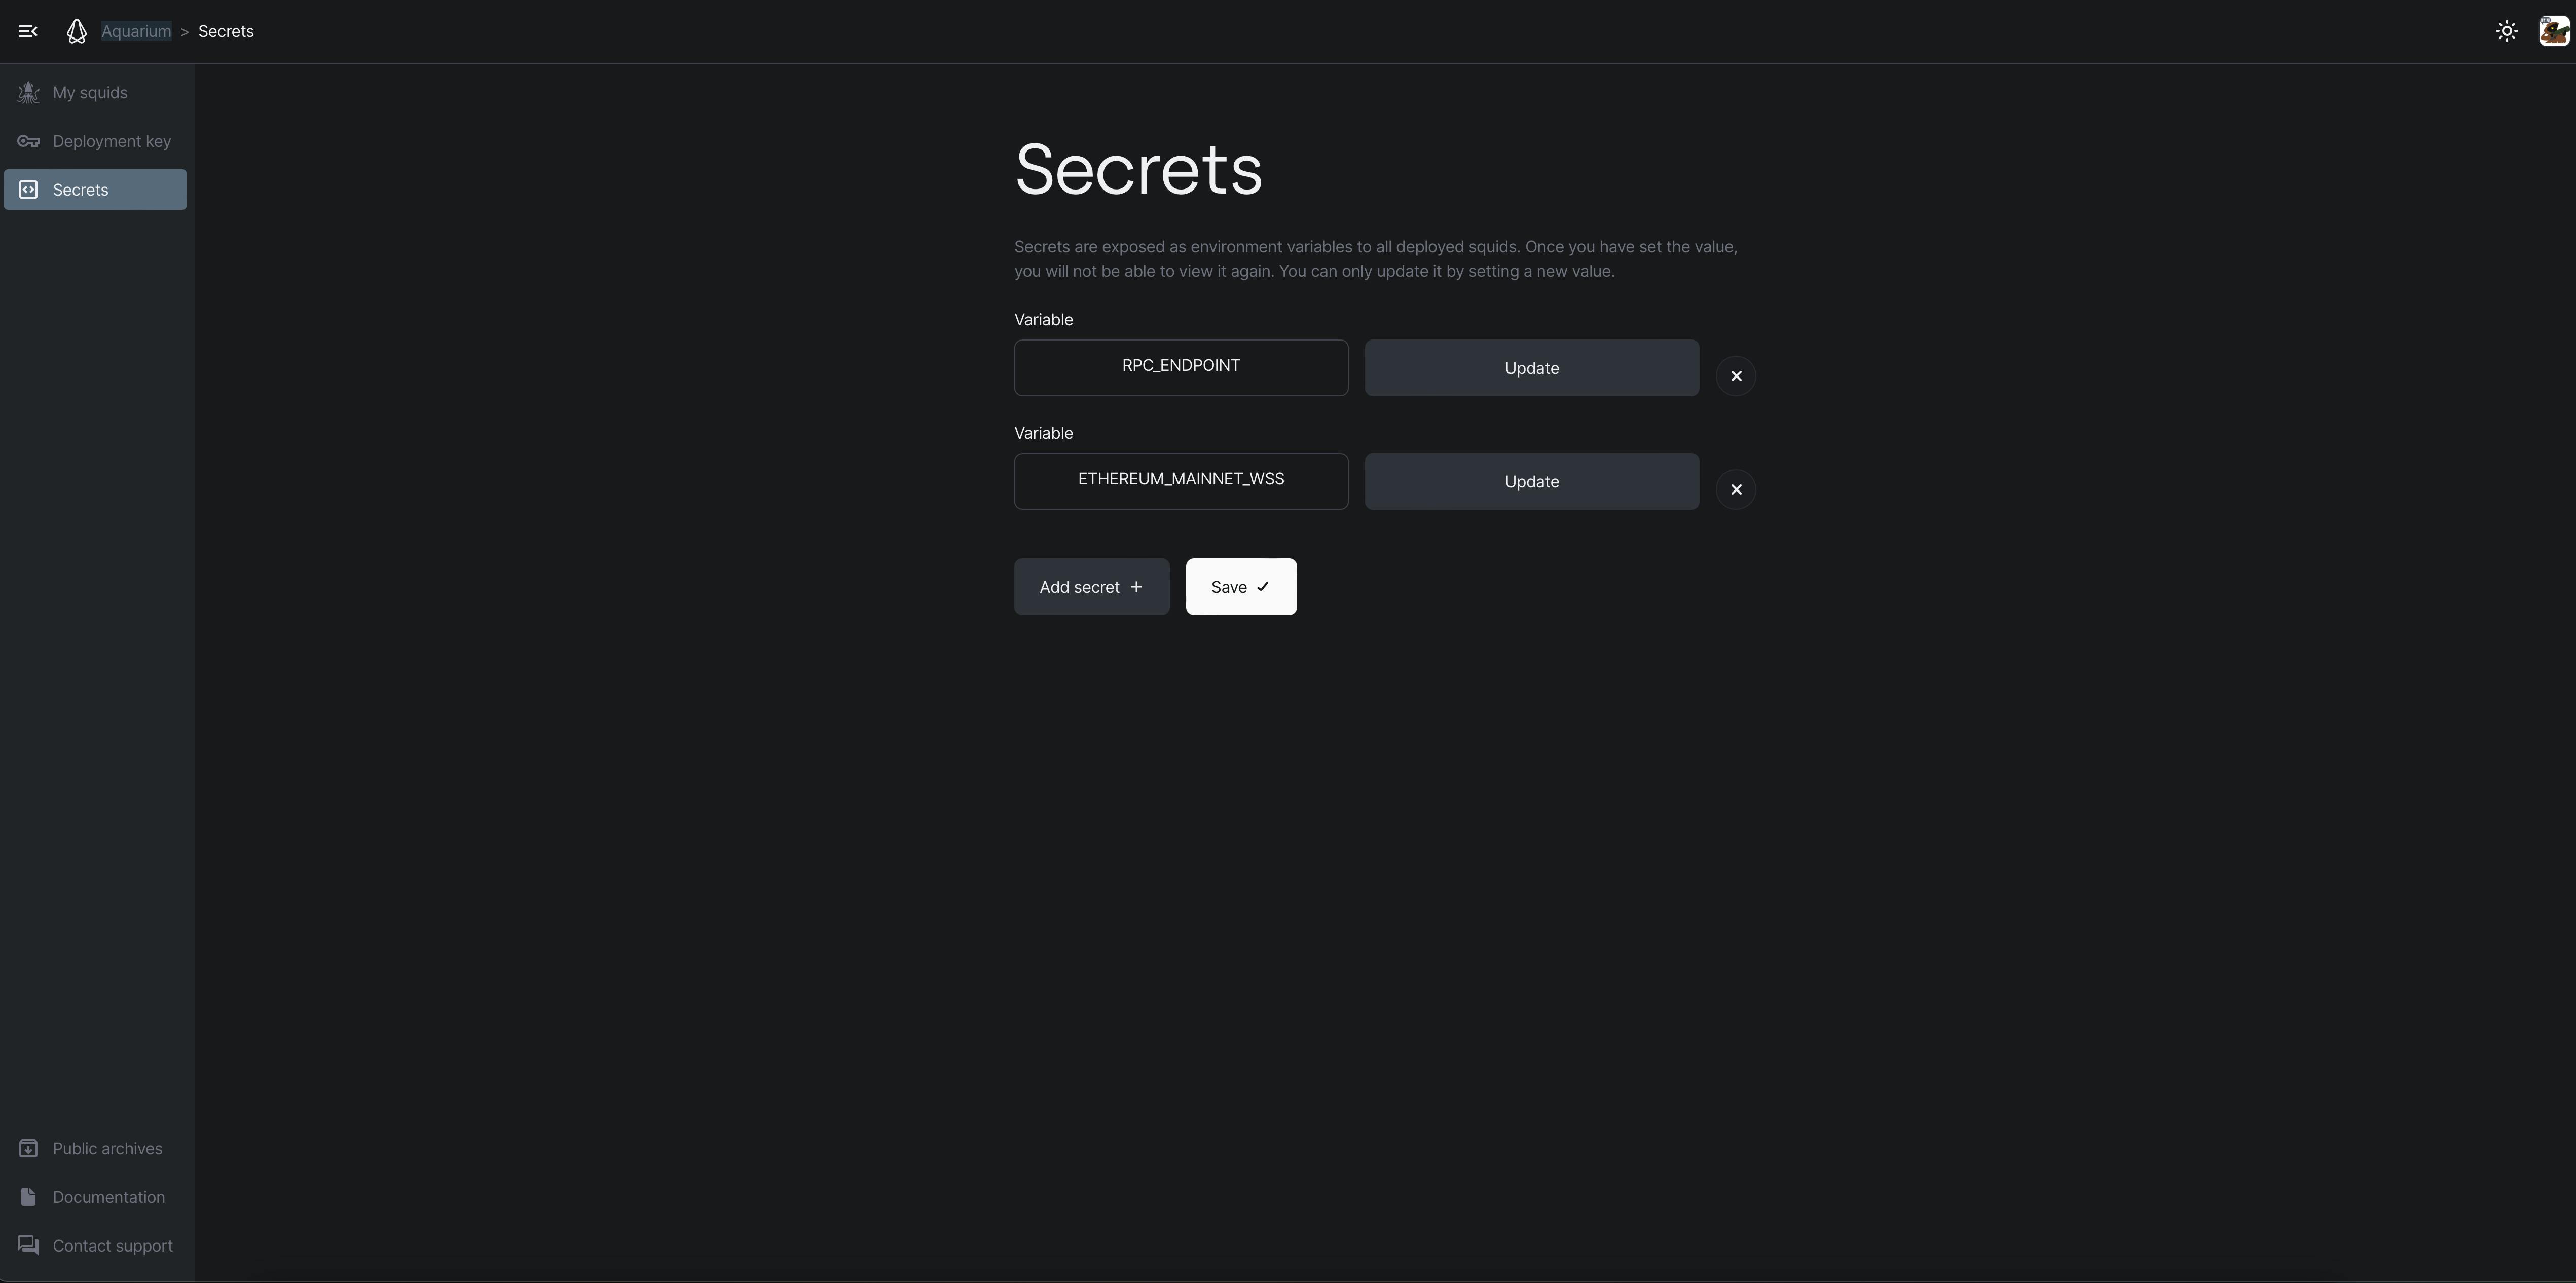
I also need to add the secrets section, because we were using an environment variable for the blockchain RPC.
The
secretsneed to be set to the correct value in the dedicated page of Aquarium
And now we are ready to run the command
sqd deploy .
It's going to take a little time to build, then publish, and then deploy the squid, but when it's done, we have a stream of the logs from the server, which is useful, in case we want to monitor.
We can also monitor the version being built in the browser page. As we saw in the beginning, there is a mini-dashboard, showing the deployed project and some status indicators.
Clicking on "View details" shows us the Logs, where we can monitor what is going on with our project.
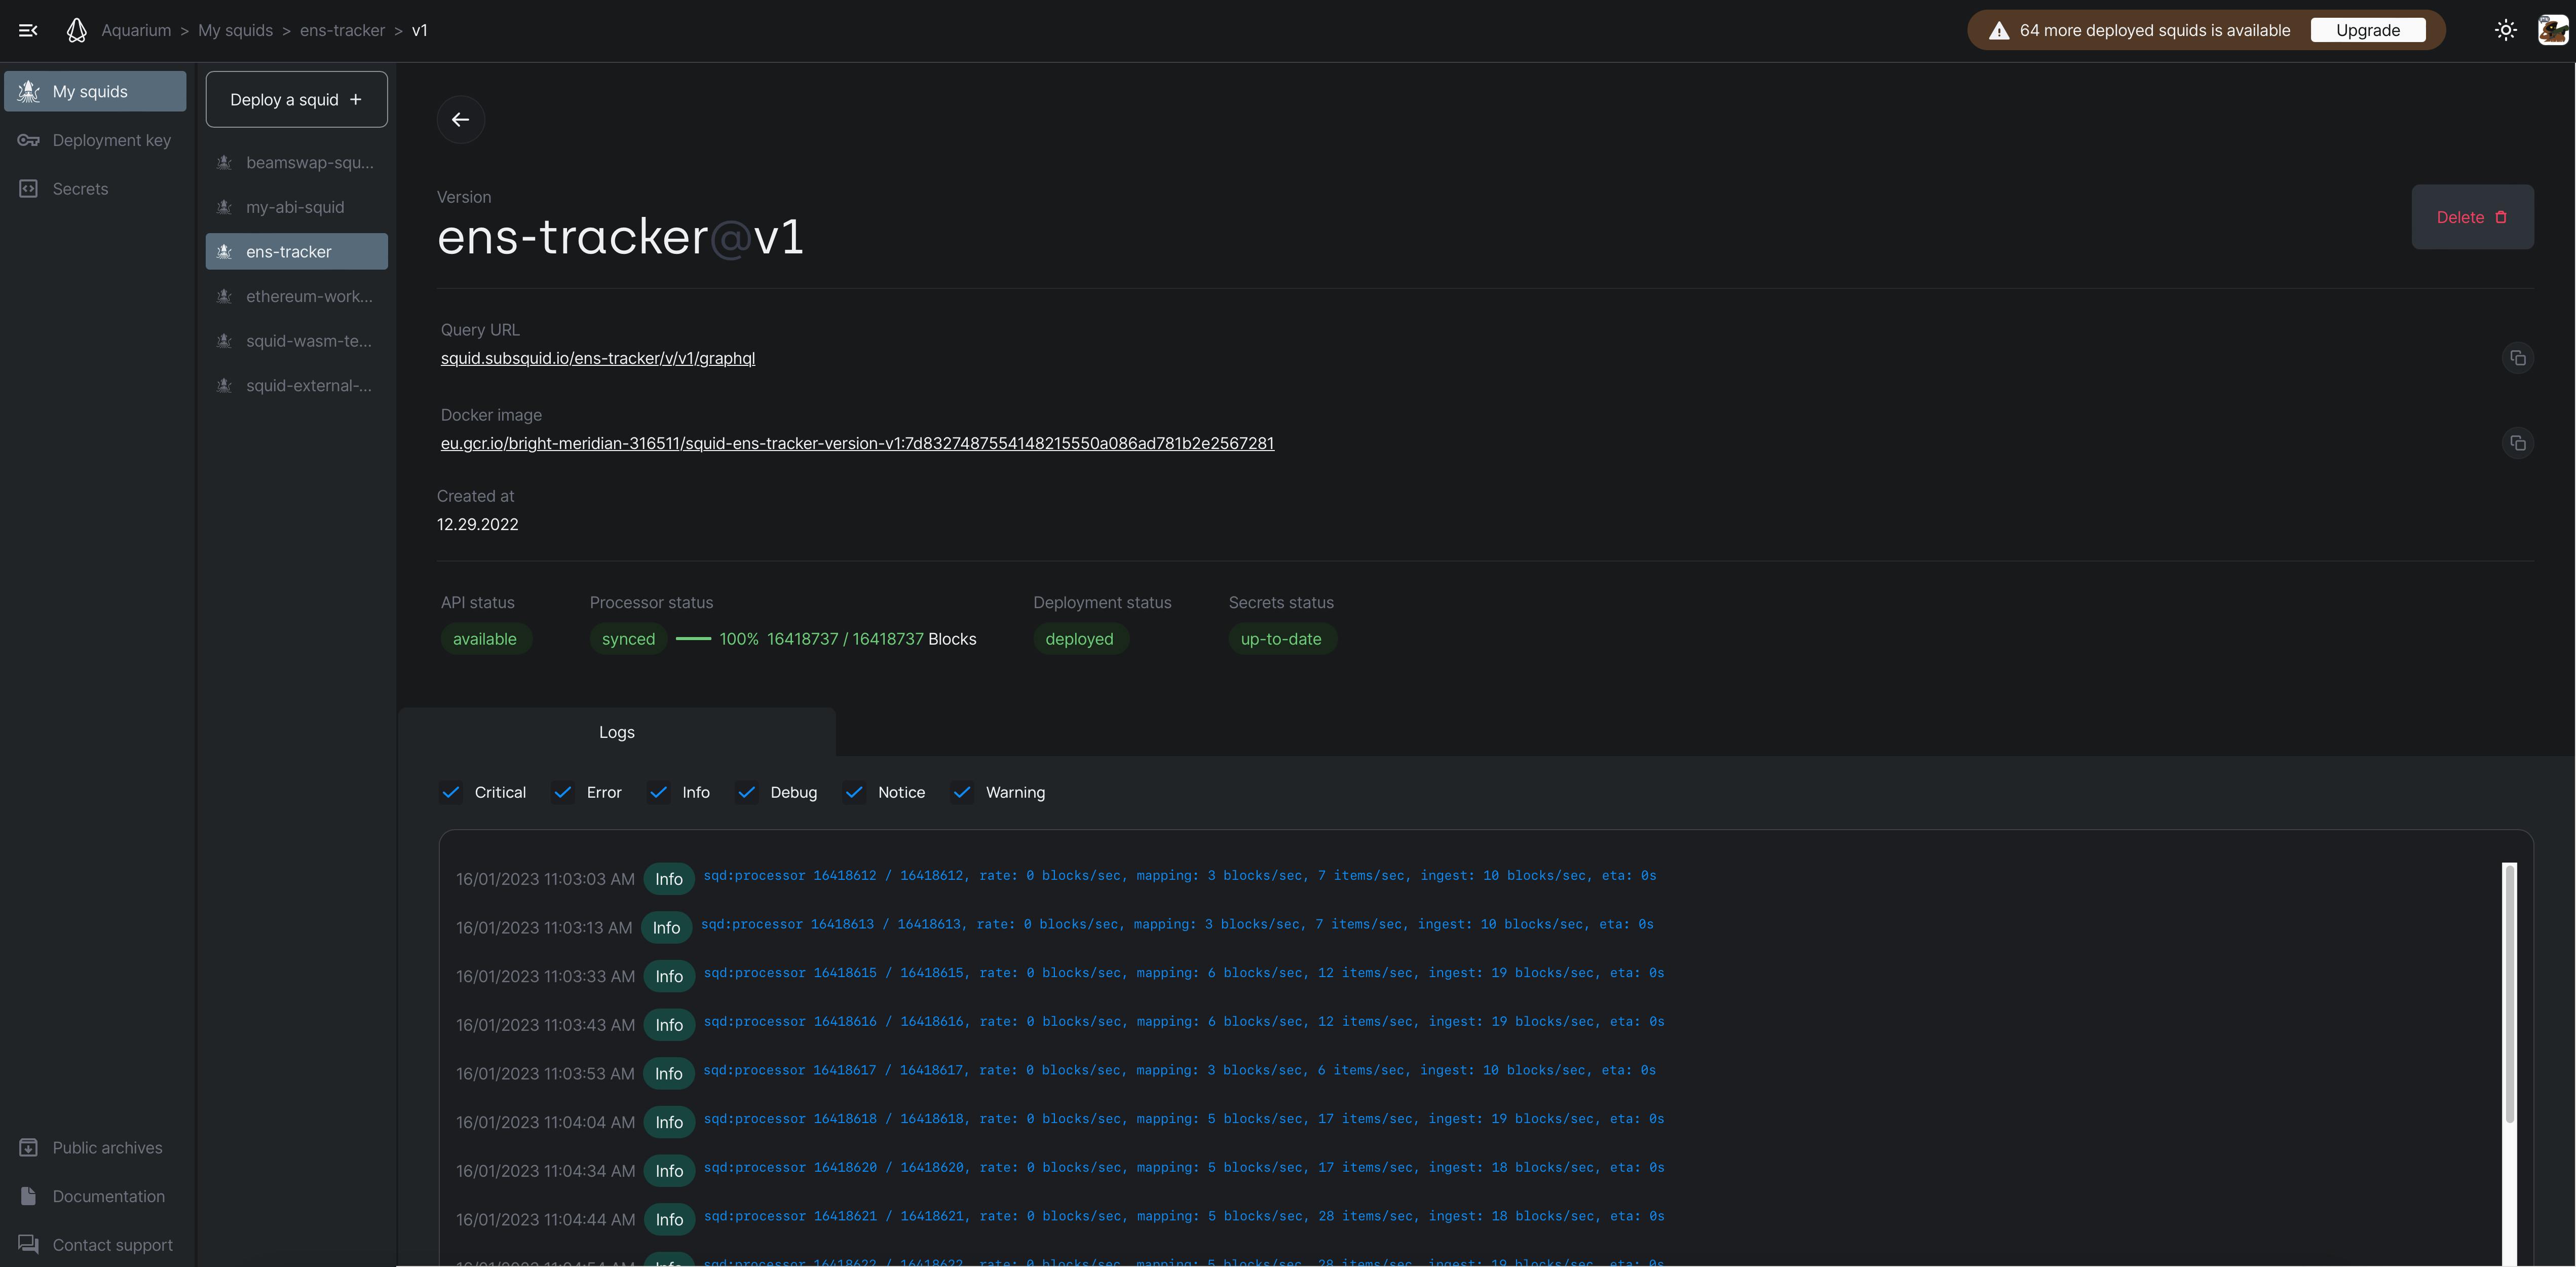
Speaking of logs, we can do the same thing from the our development environment. If we go back to the IDE, we still have the logs running, but if we want to, we can stream the logs at any time, by running the command:
sqd logs ens-tracker@v1 -f
We have to specify both the name and the version, just as with the release command. This is because, for a single project, I could have multiple versions running.
I also added the -f option, which means that I will not just receive the latest log lines, but the logs will be streamed.
I recommend once again that everyone watching head over to our docs website, where all of the available sqd commands are explained in detail, and you can learn how to update, or delete a squid.
You can also manage multiple versions of the same squid: for example, you can have a version with new features, or breaking changes, that you want to test out, before actually starting to use it. The problem with this scenario is that each version has a different URL, so you would need to update your frontend code to point to the new endpoint.
To help with that, we have put in place a canonical URL that you can assign to one version or another, by promoting them to production.
This concludes our overview of how to deploy your project to Aquarium, the hosting service for your squids.
We have learnt how to easily and quickly deploy and publish a squid ETL project to Aquarium, the hosting service by Subsquid. And briefly explained how to manage your deployed project, as well as deploy and manage multiple versions, or multiple different projects.
Stay tuned for the next instalments in this series, the next one will be about some advanced features available with Subsquid SDK, as well as some advices and best practices.
Subsquid socials: Twitter | Discord | LinkedIn | Telegram | GitHub | YouTube

