


Summary
I leveraged Subsquid’s indexing framework to build my very own API that is able to process data on Fantom network, and map every tokenId to its corresponding Rave name, allowing for querying in the opposite direction (get Rave name from tokenId ).
The project discussed in this article is available at this repository:
The repository is also configured, so you can run the project on Gitpod:

Introduction
In a quest to provide more educational material to devs, I have been creating more and more content, and most of it has been focussed on Ethereum project, or in some cases, Polygon.
But I wanted to broaden the spectrum and show that Subsquid does not just cover these blockchains, and that it is capable of indexing essentially all EVM blockchains at this point in time.
A while ago, I have created a sample project to celebrate Subsquid’s partnership announcement with Fantom, so it’s only reasonable I would use that as the topic of this article. While searching for a suitable subject, I came across Rave names, which is a domain names project building on Fantom, and the tokens generated by their smart contract were perfect for what I had in mind.
The project
Whenever someone is registering a domain name on the Rave domains app, they are minting a Non-Fungible Token from the Rave Names collection.
This token looks and behaves like a common ERC-721 token so those who have read through previous articles, will have some déjà vu, as there is a partial overlap. At the same time, there is some new information, and some information that is explained in greater detail and with more focussed examples.
Let’s get building!
A squid project has two basic requirements: First, you need to have Node.js installed on your machine. We use version 16 and above for all projects.
Second, you need to have a Docker daemon that is able to expose ports to your host machines.
Before starting, make sure to install Subsquid CLI to your system, as this will allow you to create new projects, and run useful commands:
npm i -g @subsquid/cli@latest
Create new project
Thanks to Subsquid's command line tools, creating a new project is as easy as running these commands (one, actually, the other two simply set the directory and install dependencies 😅):
sqd init my-fantom-project -t evm
cd my-fantom-project
npm i
Modifying the schema
Because the objective is to track token creation and transfer, we need to edit the schema.graphql file.
It's necessary to remove the existing schema, and add entities that capture the information we need, for example, a Token entity, as well as Owner, Contract, and Transfer. Here is the full schema, the choice of fields in each entity should be pretty intuitive:
type Token @entity {
  id: ID!
  tokenId: BigInt
  owner: Owner @index
  metadata: String
  name: String
  transfers: [Transfer!]! @derivedFrom(field: "token")
  contract: Contract
}

type Owner @entity {
  id: ID!
  ownedTokens: [Token!] @derivedFrom(field: "owner")
}

type Contract @entity {
  id: ID!
  name: String!
  symbol: String!
  contractURI: String
  totalSupply: BigInt!
  mintedTokens: [Token!]! @derivedFrom(field: "contract")
}

type Transfer @entity {
  id: ID!
  token: Token!
  from: Owner @index
  to: Owner @index
  timestamp: BigInt! @index
  block: Int! @index
  transactionHash: String! @index
}
Following these changes, we need to generate TypeScript models that corresponds to this schema, and will be useful to save data on the database. So let’s run the command:
sqd codegen
Smart contract ABI code bindings
The next step was importing the ABI into the project, so I copied it from the Contract’s page on the block explorer:
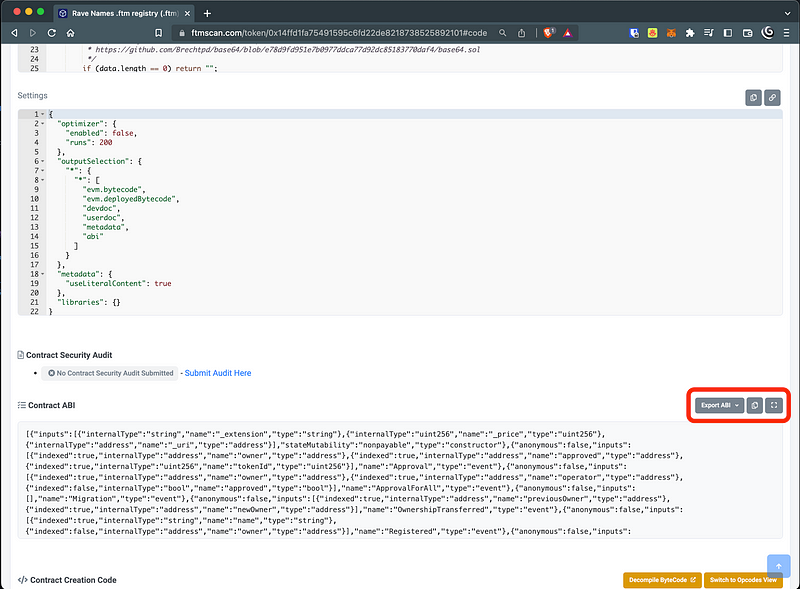
I then pasted the content in a file named rave.json in my project's root folder, and generated TypeScript boilerplate code to interact with it, thanks to Subsquid's CLI command:
sqd typegen rave.json --multicall
The --multicall option will also generate bindings to a specific type of contract, called Multicall, by MakerDAO. This kind of contract allows aggregating multiple calls to any contract's functions into one single call to the Multicall contract.
We'll be using this later on to fetch the token's metadata and batch requests for multiple tokens, instead of invoking the tokenURI function for each token.
This is a major performance improvement, as in most cases, direct communication to the blockchain through RPC nodes is the bottleneck, so minimizing the number of direct blockchain interactions is key.
Processor configuration
As mentioned, whenever a domain is registered on the Rave app, a new token is created, and to do so, users invoke the registerName function of the smart contract.
On the other hand, since each domain is a token, it can be traded, and whenever this happens, the smart contract emits a Transfer event (just like every other ERC-721 token).
Consequently, to track all the domains, and who owns them, it was sufficient to index and process this transaction and this event.
To do so, we need to change the processor.ts file and configure the EvmBatchProcessor class instance:
const raveAddress = "0x14ffd1fa75491595c6fd22de8218738525892101";
const multicallAddress = "0xD98e3dBE5950Ca8Ce5a4b59630a5652110403E5c".toLowerCase();

const processor = new EvmBatchProcessor()
  .setDataSource({
    chain: process.env.RPC_ENDPOINT,
    archive: 'https://fantom.archive.subsquid.io',
  })
  .addTransaction(raveAddress,{
    sighash: functions.registerName.sighash,
    data: {
      transaction: {
        hash: true,
        from: true,
        input: true,
        to: true
      }
    } as const
  })
  .addLog(
    raveAddress, {
      filter: [[events.Transfer.topic]],
      data : {
        evmLog: {
          topics: true,
          data: true
        },
        transaction: {
          hash: true,
        }
      } as const
    }
  );
The section that follows is where the processor is launched (the .run() function call), and where a callback function to process a batch of items (any event or transaction) is defined.
The first step is to loop through all of the items included in a single batch of data received from the Subsquid Archive for Fantom. For each item, it's necessary to recognize its type, as contract events and transactions have to be treated separately.
processor.run(new TypeormDatabase(), async (ctx) => {
  const raveDataArray: RaveData[] = [];
  let tokenCounter = await ctx.store.count(Token);

  for (let b of ctx.blocks) {
    for (let i of b.items) {
      if (i.address !== raveAddress) continue;
      switch (i.kind) {
        case 'evmLog':
          if (i.evmLog.topics[0] === events.Transfer.topic) {
            raveDataArray.push(handleTransfer({
              ...ctx,
              block: b.header,
              ...i
            }))
          }
          break;
        case 'transaction':
          if (i.transaction.input.slice(0, 10) === functions.registerName.sighash) {
              raveDataArray.push(handleRegistered({
                ...ctx,
                block: b.header,
                ...i
              }, tokenCounter))
              // increment token counter
              tokenCounter += 1;
          }
          break;
      }
    }
  }

  await saveRaveData(
    {
      ...ctx,
      block: ctx.blocks[ctx.blocks.length - 1].header,
    },
    raveDataArray
  );
});
Notice the two different handle* functions. They are not too different from each other, but it's still important to separate the logic.
To keep this article reasonably short, I will avoid posting the content of the entire file. I will instead describe the logic, and I recommend looking at the repository for reference, instead.
Data extracted from events and transactions is accumulated in an array, which is then processed at the end of the function, outside the loop. This is another performance improvement, as saving data in batch is much more efficient.
The schema defines a Contract entity, in which we are saving the collection name, the symbol and the total supply. Because this project is only indexing one contract, it's possible to handle that with a function named getOrCreateContractEntity, that uses a singleton instance to "cache" this information. We can make this function resilient to the processor being restarted, by adding a lookup to the database that will check if an instance of the contract has been saved before.
The last piece of logic in this file is the saveRaveData function. This receives the array of data extracted from each event and transaction contained in the batch and saves it on the correct database models ( Owner, Token, Transfer).
It is important to highlight that this is where getOrCreateContractEntity is used, to link each Token with their related Contract.
Also, at the very end, the Multicall contract is used to aggregate calls to the tokenURI function for each token encountered in the processed batch.
Note: the address of the Multicall contract was obtained from this pull Request to the official MakerDAO repository. A second pull request for a second deployed contract also exists.
Launch the indexer
If you have followed along and want to try this at home, you should launch the database container first:
sqd up
Then generate a new migration file (this will also delete any previously existing migration files):
sqd migration:generate
Launch the processor:
sqd process
Note: at the moment of writing the article, the Multicall contract seems to be having issues:
tryAggregaterequests error due to lack of gas, although these should be gas-less transactions.The project has been successfully tested in the past, and what is shown here has been proven to work. Independently from the (hopefully momentary) issue with Multicall contract on Fantom network, the concept illustrated in this article still stands.
Furthermore, it is also possible to obtain tokens' metadata with multiple single calls to the
tokenURIfunction of the Rave contract, as shown here. This will be much slower and inefficient, but it will, however, work.
And finally, in a separate terminal window, launch the GraphQL service:
sqd serve
We can, for example, test out our initial question: “what is the name of the first registered rave domain (i.e.: token #1 in the collection)?" with this query:
query MyQuery {
  tokens(where: {id_eq: "1"}) {
    tokenId
    metadata
    name
    owner {
      id
    }
  }
}
Conclusions
At Subsquid, we are convinced that the mass adoption of Web3 will be driven by dApps with complex data models and high volumes of data written on- and off-chain. We want to make storage and indexing of this data inexpensive and incredibly fast.
Archives make sure that different developers don’t have to extract the same information multiple times, avoiding duplicated efforts of data ingestion.
At this point it's the vast majority agrees that the future is multi-chain, and this agrees with Subsquid's vision. That's why in the recent period we have deployed so many new Archives, ingesting data for many new networks.
What I tried to show in this article is how to use Subsquid to build your own indexer for Fantom network. This indexer is able to map every tokenId generated by the Rave names project to its corresponding Rave domain, allowing for querying in the opposite direction (get Rave name from the tokenId).
If you found this article interesting, and you want to read more, please follow me and most importantly, Subsquid.
**Subsquid socials:
**Twitter | Discord | LinkedIn | Telegram | GitHub | YouTube