Summary
The last three published articles were focussed on blockchain data analysis, and in the latest one, I discussed the use of parquet files.
In this new installment of this short series, I want to demonstrate how the Subsquid SDK can also be used to easily save indexed data on the Cloud, using S3-compatible APIs, such as the ones offered by Filebase.
Filebase is a solution for storing data on centralized networks, removing unnecessary complexity and using familiar tools.
The project discussed in this article is hosted on a GitHub repository:
Introduction
Many data analysts have grown accustomed to using Cloud storage for their data. After all, it's so convenient, it's reliable, and gives users the flexibility to expand, should they need to, and only pay for what they consume.
But the convenience of Centralized cloud solutions comes at the cost of putting your data at risk. These services are susceptible to data breaches, and they can be unilaterally shut down or interrupted at any moment in time.
Tools such as Filebase help with the global adoption of decentralized solutions, by bridging the gap between the new technologies being built, such as IPFS, and the current industry standards that developers are used to, like S3 buckets, and S3 APIs for saving files on remote locations.
They offer a storage solution that removes complexity and allows developers to use tools they already know, like S3-compatible APIs, on top of unlimited service and predictable pricing.
The motivation for this project is two-fold. The first is to demonstrate the ability of Subsquid SDK, and show that it covers the need to connect to remote storage solutions. Then, in yet another step towards decentralizing the industry, I wanted to showcase how it's possible to keep your data safe and maintain full control over it, while still using familiar tools, thanks to Filebase.
Project setup
For this article, I actually chose to fork the project treated in this article, about indexing to local CSV files. Everything described and developed in the article and in the project is valid and useful, and this article represents an extension to it, should anyone be needing to move their data to remote storage.
For this reason, I recommend either following the setup steps described in the article or forking the original repository, which we are going to use as the base, from this point forward.
Remote storage library
The first thing to do, at this point, is to install a library dedicated to connecting with S3-compatible APIs for remote storage. From the project's root folder, open a terminal, then type and launch this command:
npm i @subsquid/file-store-s3
Filebase account and credentials
In order to use Filebase service, it's necessary to signup first, but the good news is it's really easy to get started with a free account, and only pay when the data needs become substantial (>5GB, >1000 pinned files).
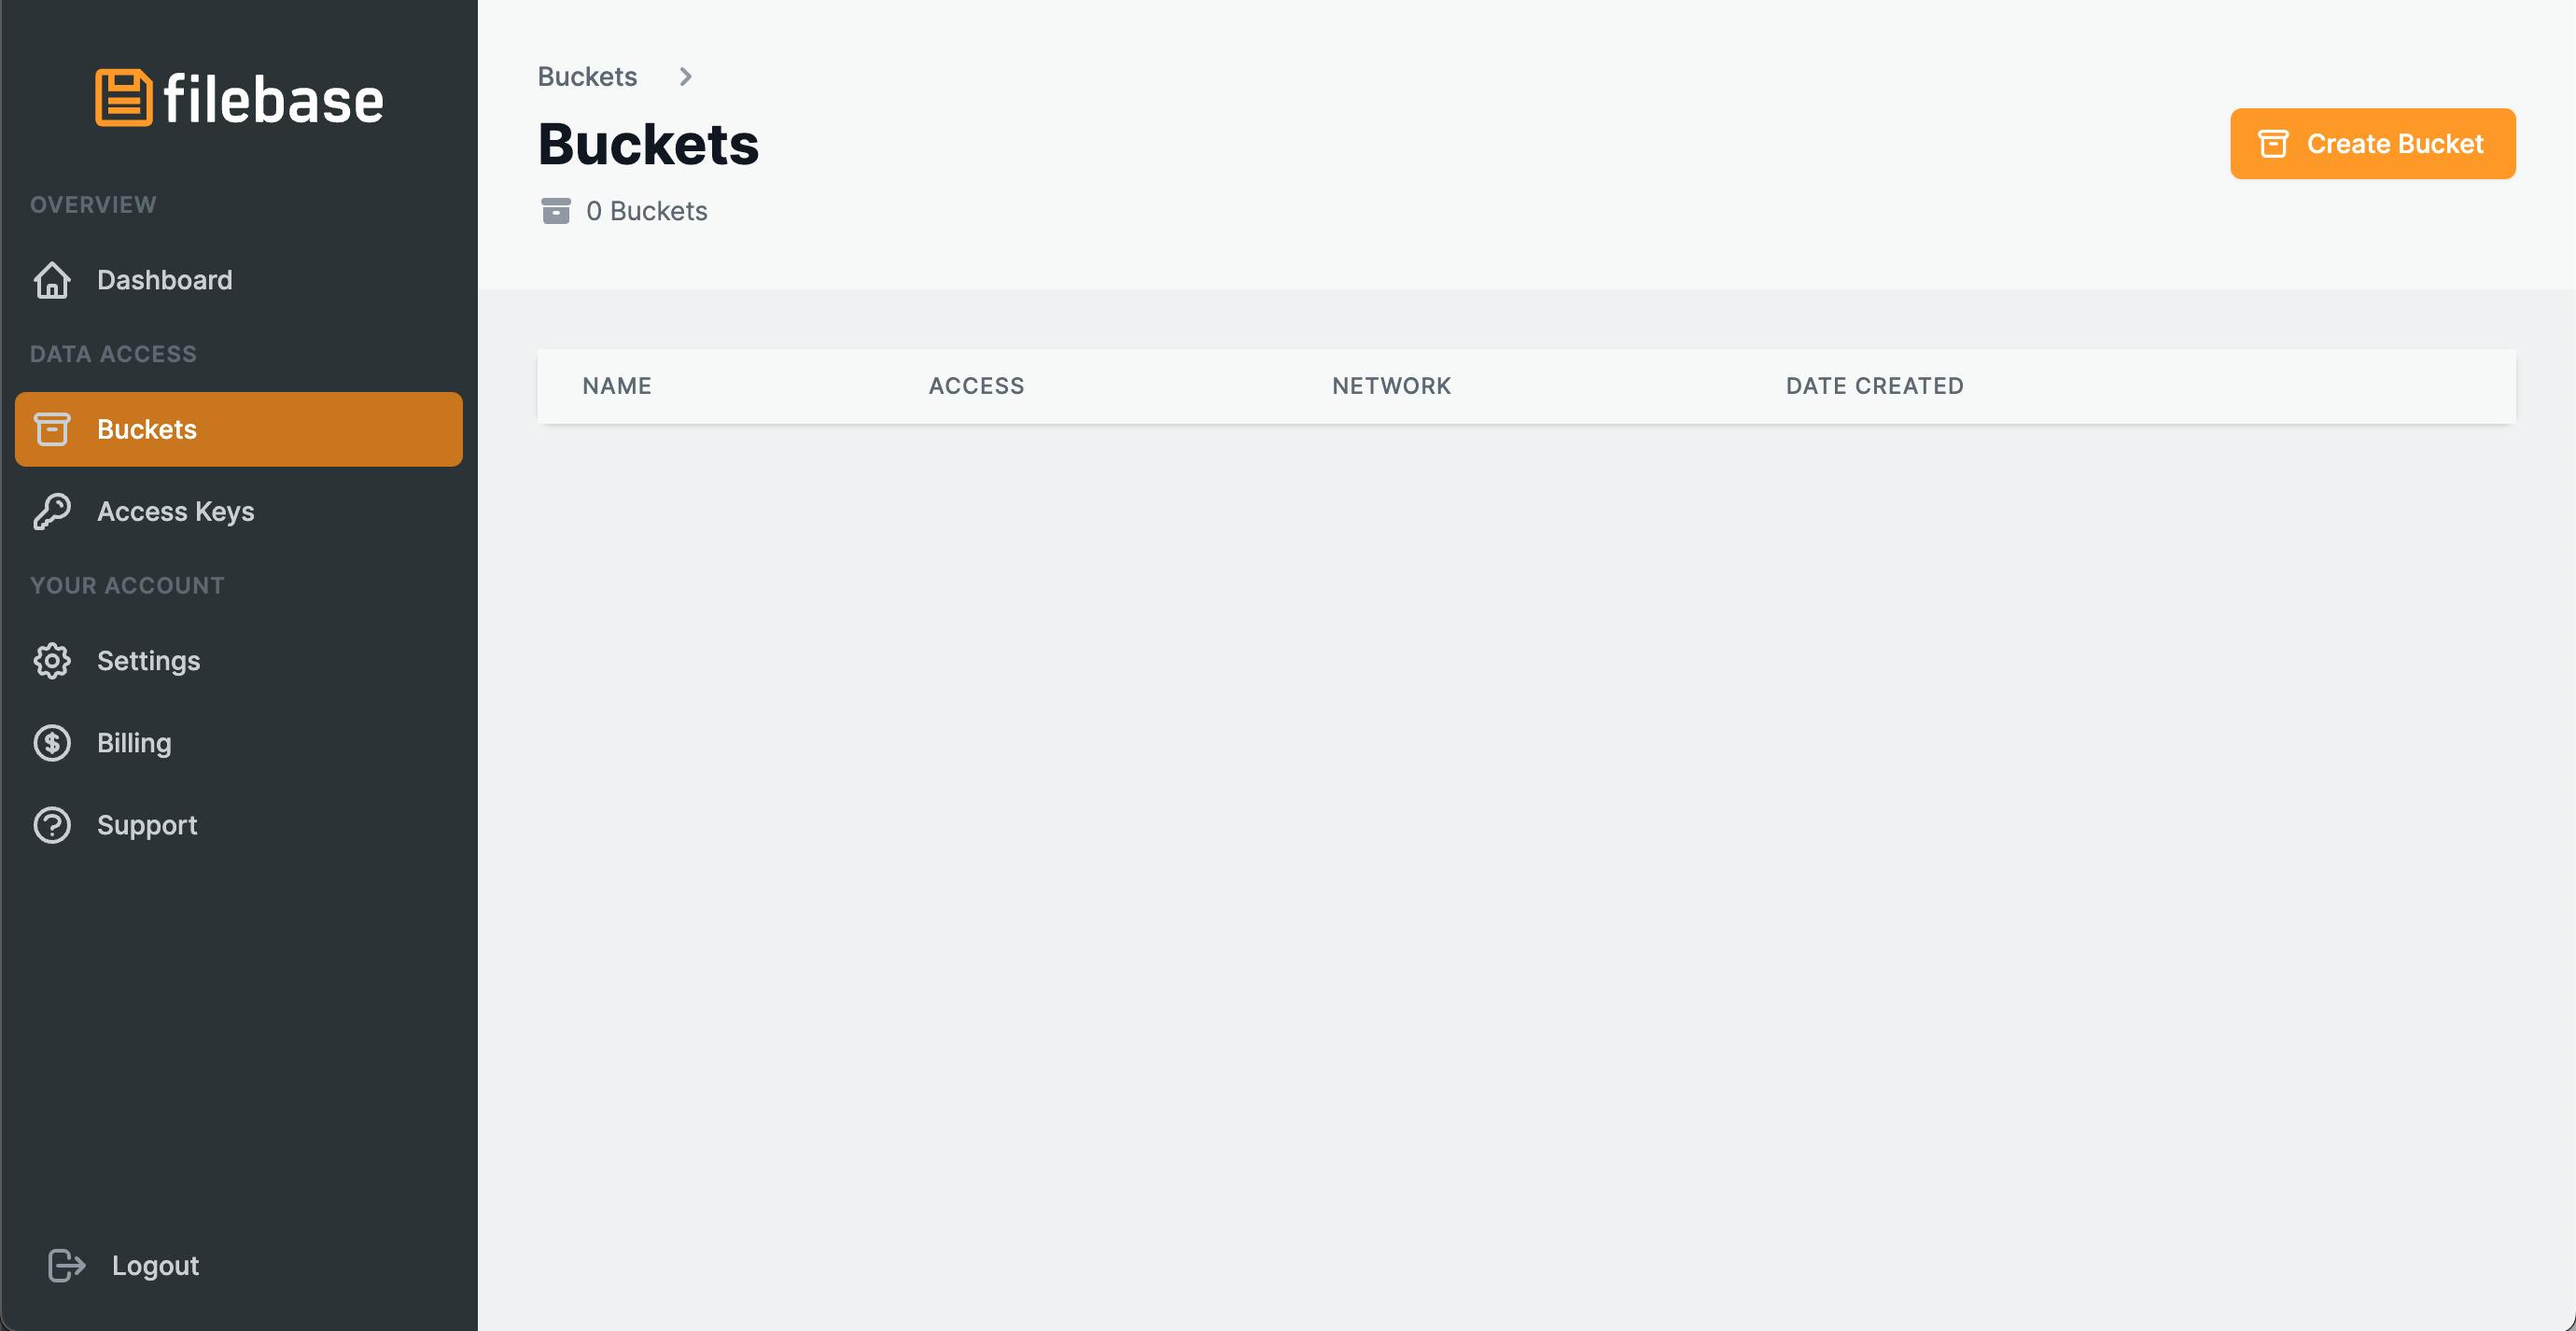
Once signed up, make sure to head over to the console dashboard, select Buckets from the menu on the left, and create a new bucket. Take note of the bucket's name, as you'll be needing this later.
Next, head over to the Access Keys section, which you need to access, to obtain the API credentials, labeled "Key", and "Secret".
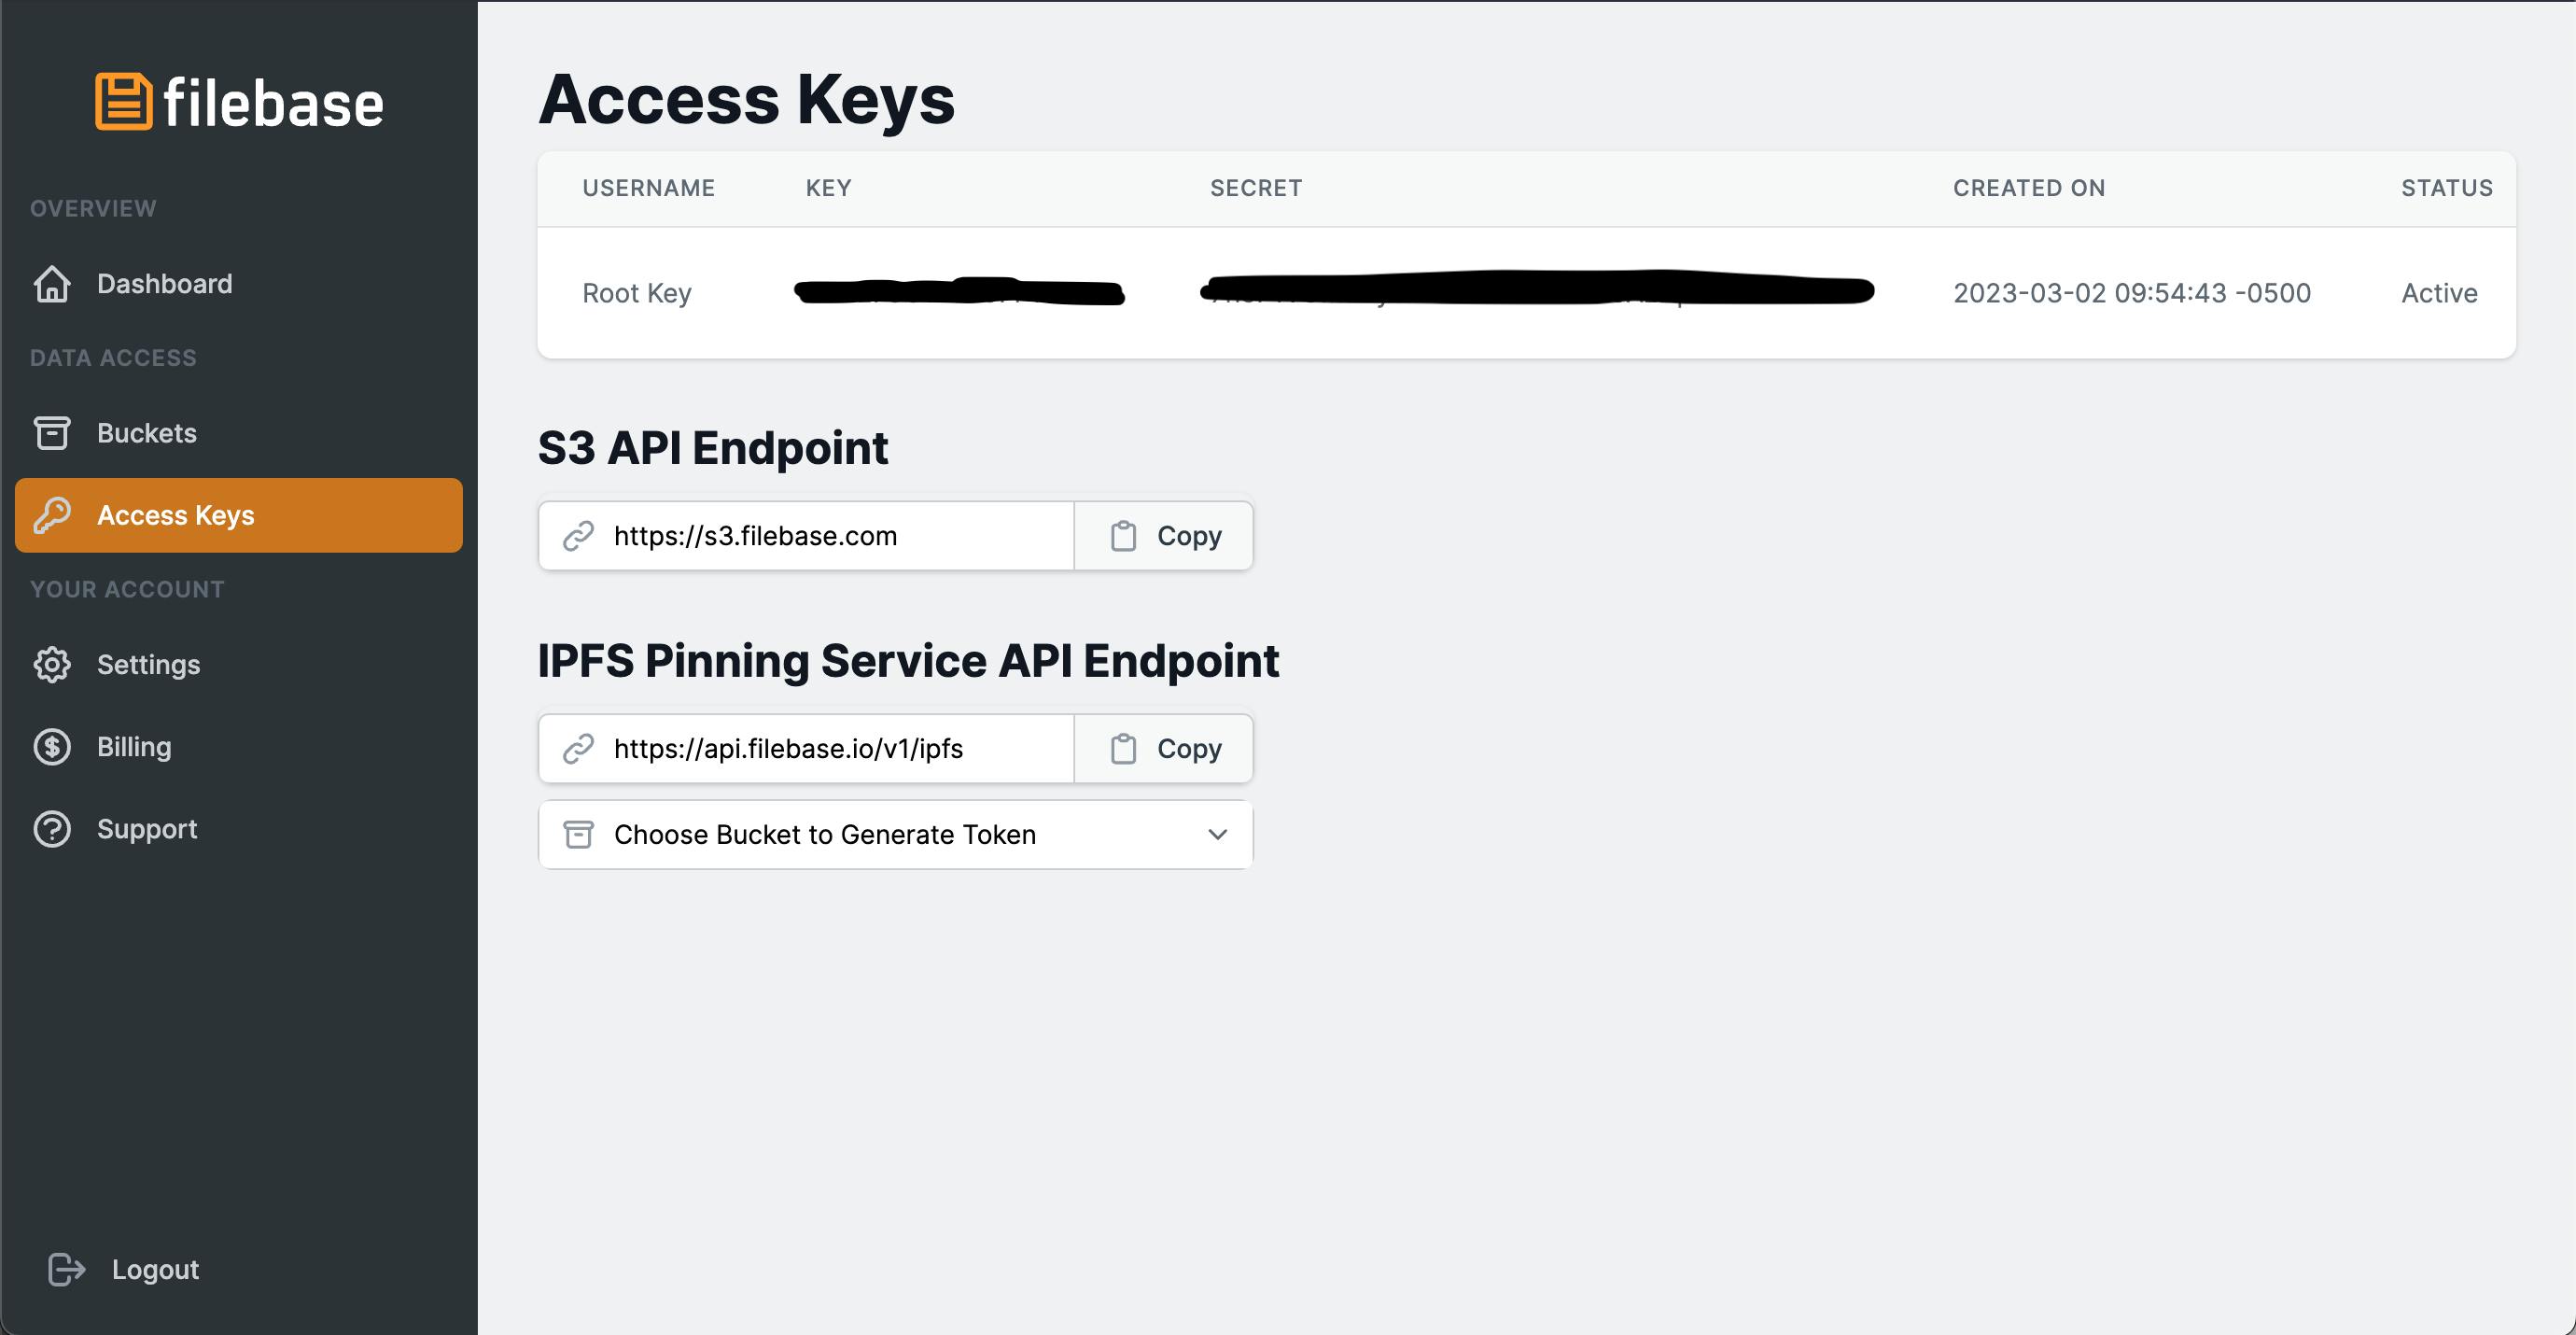
Take note of their values, or have them handy for the next paragraph.
Note: the S3 API Endpoint is important to make sure you are connecting to Filebase, and not the default AWS S3 service, but it's the same for everyone. Just know that it can be found on this screen, should you need it.
Database class configuration
In the article dedicated to local CSV files, I showed how to create a db.ts file that configured a Database class, responsible for interfacing with the processor, and orchestrating writing to CSV files (abstracted as "Tables").
It's then necessary to open this file, located under the src folder, and change dest configuration parameter, to use a new remote location named S3Dest. Here's the content of the file, after the changes:
import { Database, LocalDest, Store } from "@subsquid/file-store";
import { S3Dest } from "@subsquid/file-store-s3";
import { Transfers } from "./tables";

export const db = new Database({
  tables: {
    Transfers,
  },
  dest:
    process.env.DEST === "S3"
      ? new S3Dest(process.env.FOLDER_NAME, process.env.BUCKET_NAME, {
          region: process.env.S3_REGION,
          endpoint: process.env.S3_ENDPOINT,
          credentials: {
            secretAccessKey: process.env.S3_SECRET_ACCESS_KEY || "",
            accessKeyId: process.env.S3_ACCESS_KEY_ID || "",
          },
        })
      : new LocalDest("./data"),
  chunkSizeMb: 100,
  syncIntervalBlocks: 10000,
});
export type Store_ = typeof db extends Database<infer R, any>
  ? Store<R>
  : never;
This code uses environment variables to configure the file storage to the Cloud. Here's an example of how to change the .env file accordingly, and make sure the environment variables are set:
DB_NAME=squid
DB_PORT=23798
GQL_PORT=4350
# JSON-RPC node endpoint, both wss and https endpoints are accepted
RPC_ENDPOINT="https://rpc.ankr.com/eth"
DEST=S3
S3_REGION=us-east-1
S3_ENDPOINT=https://s3.filebase.com
S3_SECRET_ACCESS_KEY=<YOUR_SECRET_ACCESS_KEY>
S3_ACCESS_KEY_ID=<YOUR_KEY_ID>
BUCKET_NAME=<YOUR_BUCKET_NAME>
FOLDER_NAME=<YOUR_FOLDER_NAME>
Note: pay attention to the last four variables, where you'll have to insert the values obtained in the previous paragraph.
Data indexing
The indexing logic defined in processor.ts is unchanged from the local CSV files project, so please use the related article as a reference, should you need it.
To launch the project, simply open a terminal and run this command:
sqd process
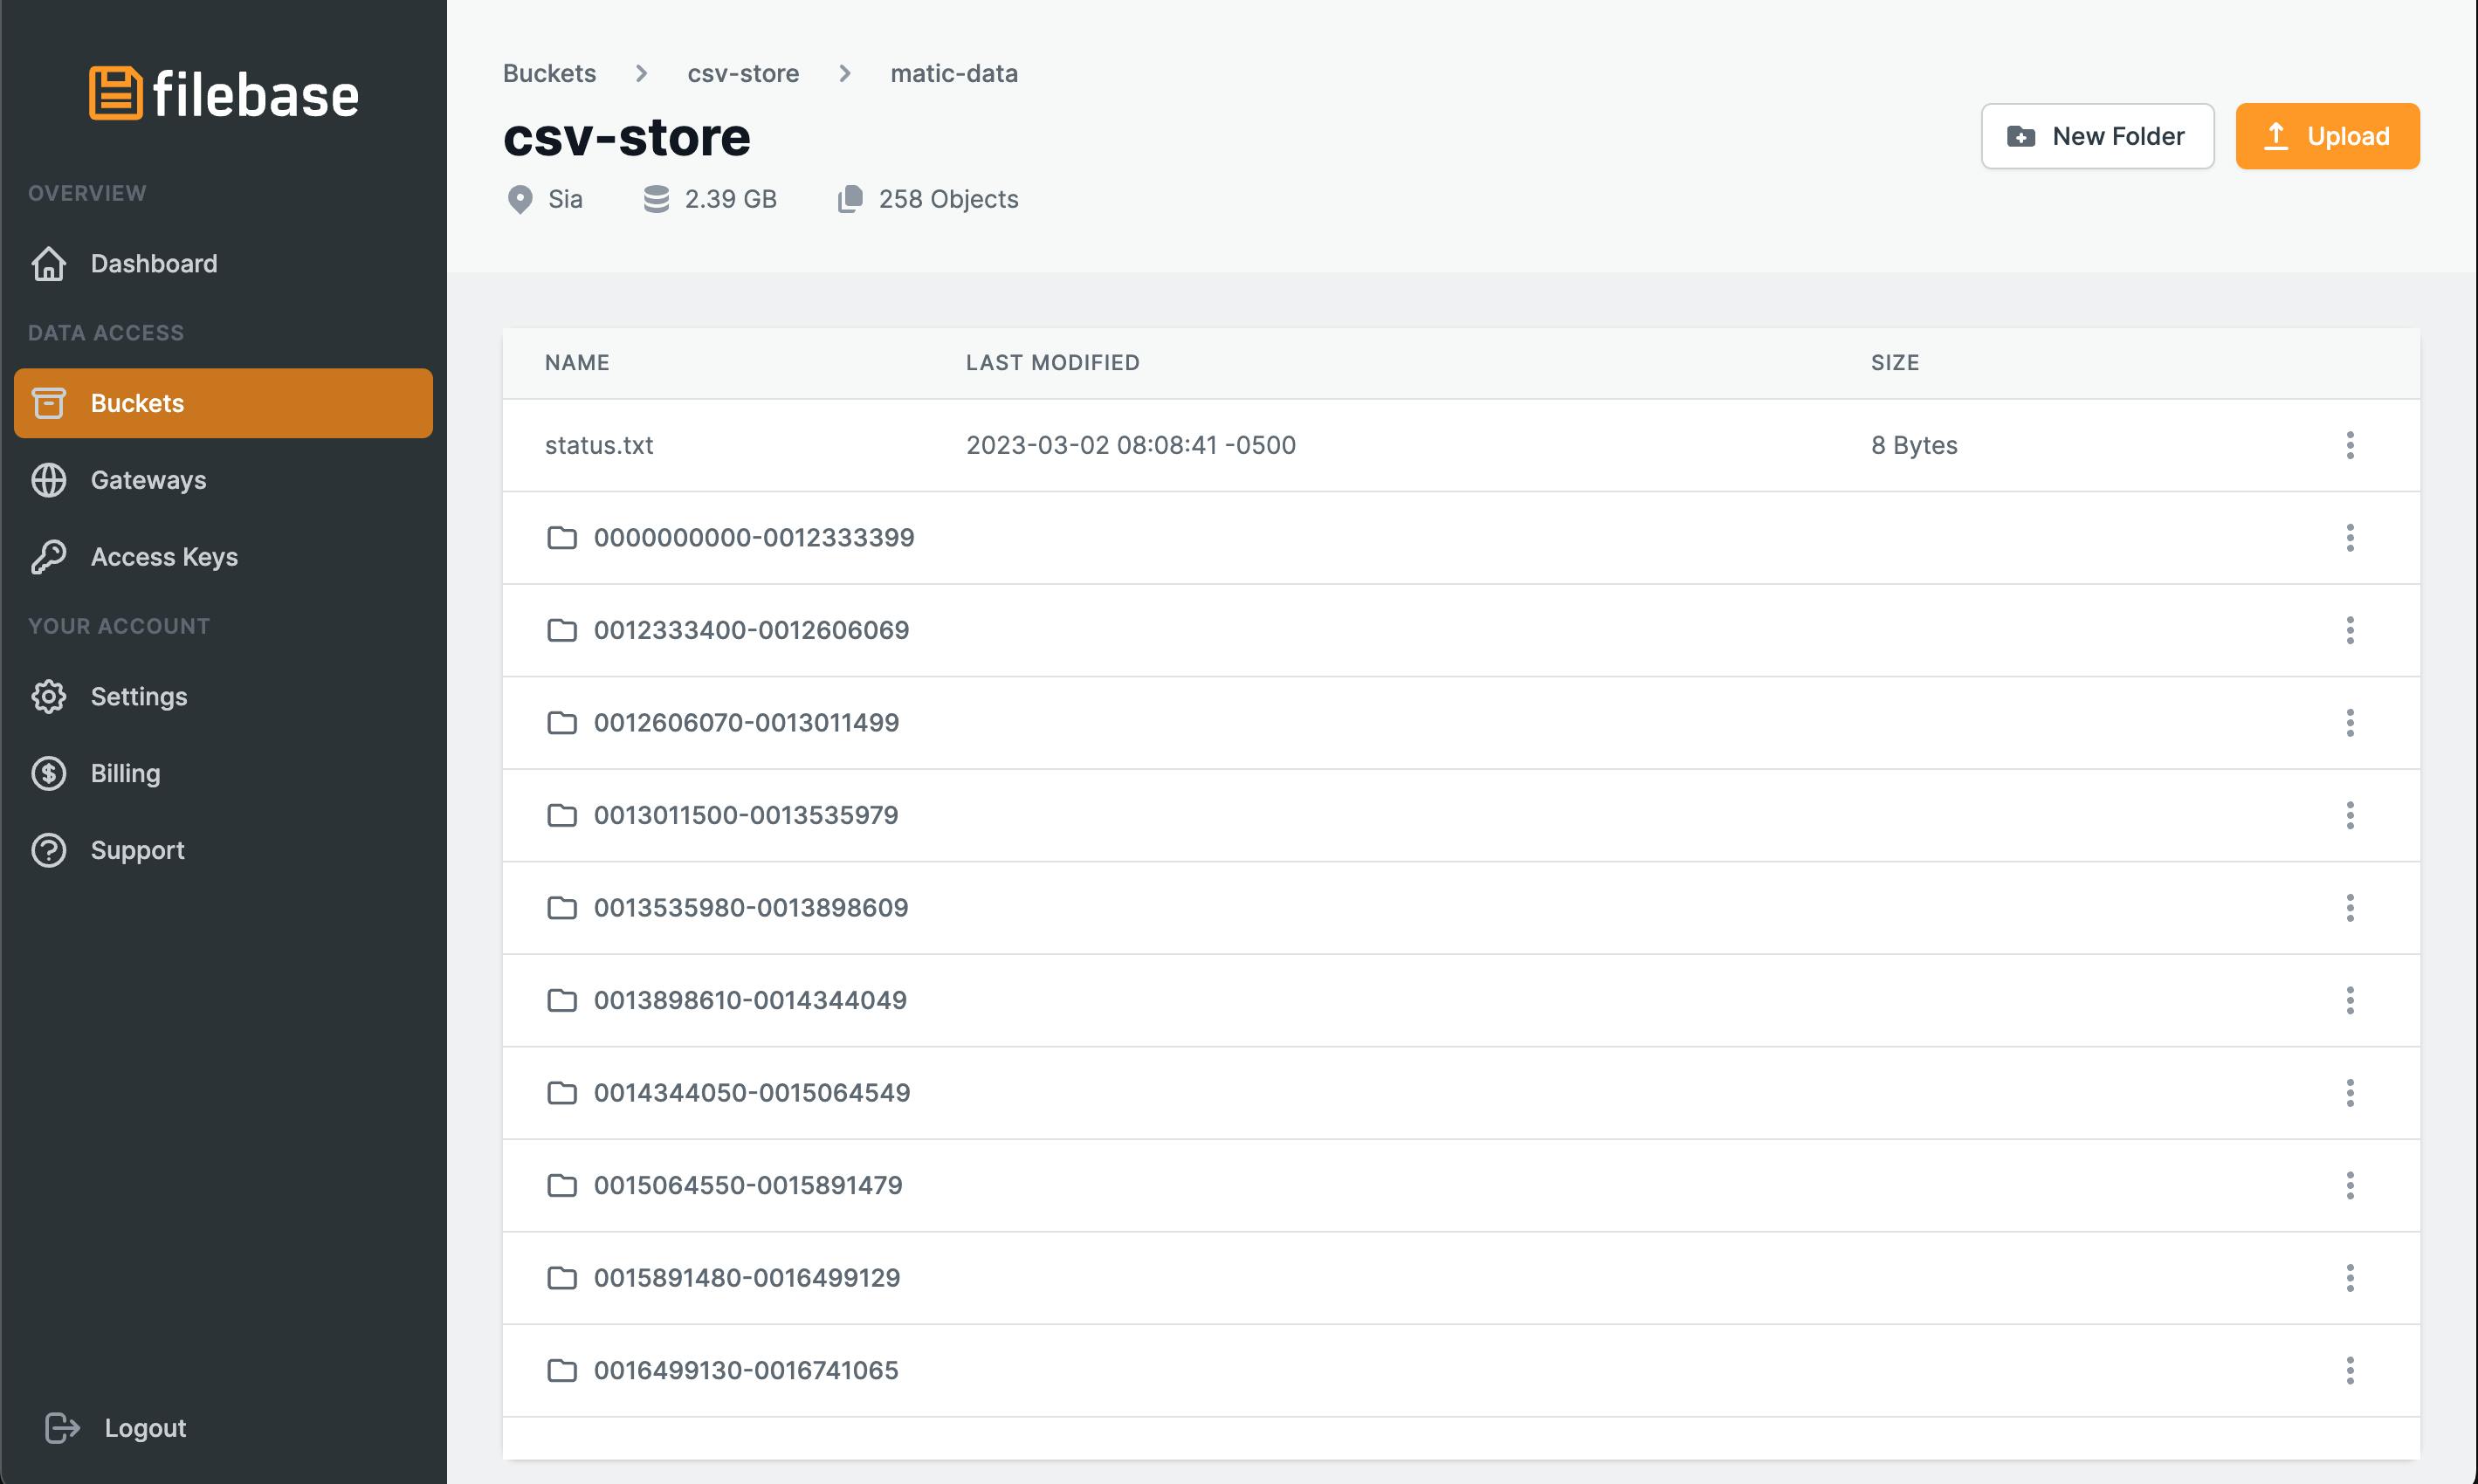
And in a few minutes, you should have a few sub-folders (whose names are the block ranges where the data is coming from) in the bucket and folder you have chosen, each containing a transfer.csv file.
Python data analysis
The local CSV files article already had a simple Python script to showcase how to process the indexed data. For this article, the focus is to demonstrate how the same script can be modified to connect to remote storage, and still accomplish the same goal.
While doing this, I had a bit of fun refactoring the script to define multiple functions, so it may look quite different from the original, but it's actually the same, the only real difference is included in the fetch_and_read_csv function, which connects to the S3 API, using AWS' official Python SDK named boto3. Here's the content of the entire file:
import pandas as pd
import matplotlib.pyplot as plt
import boto3
import os
from dotenv import load_dotenv

def get_client():
    load_dotenv(dotenv_path="../.env")

    S3_REGION = os.getenv('S3_REGION')
    S3_ENDPOINT = os.getenv('S3_ENDPOINT')
    S3_ACCESS_KEY_ID = os.getenv('S3_ACCESS_KEY_ID')
    S3_SECRET_ACCESS_KEY = os.getenv('S3_SECRET_ACCESS_KEY')

    client = boto3.client('s3',
                          region_name=S3_REGION,
                          endpoint_url=S3_ENDPOINT,
                          aws_access_key_id=S3_ACCESS_KEY_ID,
                          aws_secret_access_key=S3_SECRET_ACCESS_KEY,)

    return client

def get_csv_files(client):
    response = client.list_objects(
        Bucket='csv-store',
        Prefix='matic-data'
    )

    csv_files = [obj.get("Key") for obj in response.get(
        "Contents") if obj.get("Key").endswith(".csv")]
    return csv_files

def fetch_and_read_csv(client, key):
    res = client.get_object(Bucket="csv-store", Key=key)
    try:
        df = pd.read_csv(res.get("Body"), index_col=None, header=None, names=[
            "block number", "timestamp", "contract address", "from", "to", "value"])
    except Exception as ex:
        template = "An exception of type {0} occurred. Arguments:\n{1!r}"
        message = template.format(type(ex).__name__, ex.args)
        print(message)
    else:
        return df

def get_dataframe():

    client = get_client()
    csv_files = get_csv_files(client=client)

    if len(csv_files) == 0:
        print("No CSV file in remote bucket")
        return
    try:
        df = pd.concat(map(lambda csv_file: fetch_and_read_csv(
            client=client, key=csv_file), csv_files), axis=0, ignore_index=True)
    except Exception as ex:
        template = "An exception of type {0} occurred. Arguments:\n{1!r}"
        message = template.format(type(ex).__name__, ex.args)
        print(message)

    else:
        df['datetime'] = pd.to_datetime(df['timestamp'])
        df.sort_values(["timestamp", "from", "value"], inplace=True)
        return df

def main():
    df = get_dataframe()
    if df is None:
        return 1
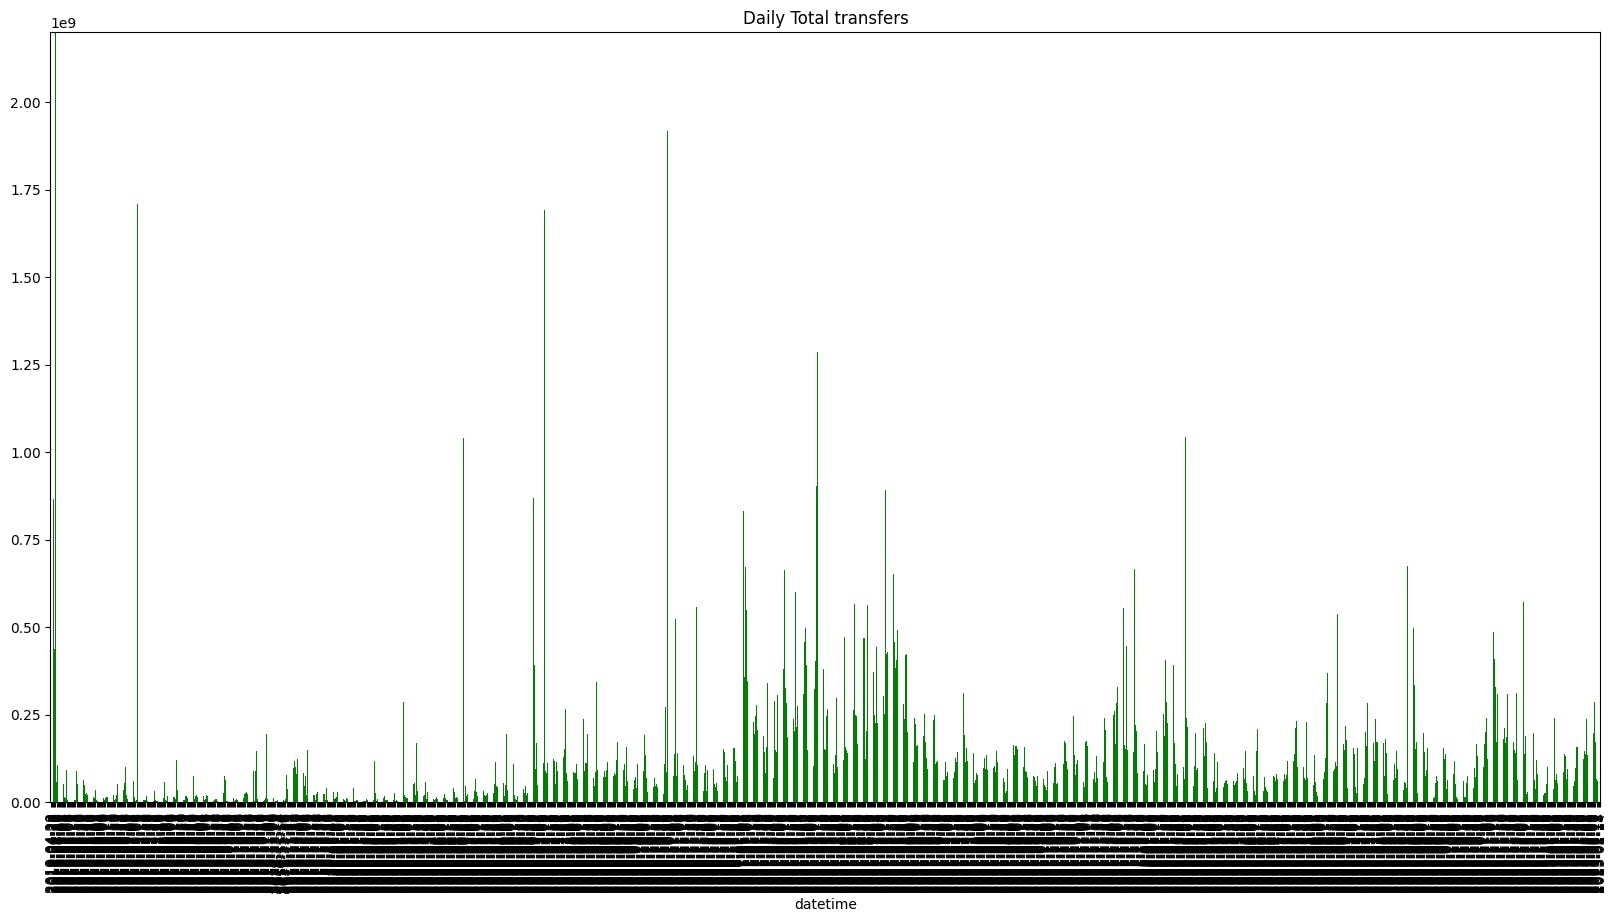
    sumDf = df.groupby(df.datetime.dt.date)['value'].sum()

    sumDf.plot(kind='bar',
               x=0,
               y=1,
               color='green',
               title='Daily Total transfers',
               # ylim=(0, 2200000000.0)
               )

    # show the plot
    plt.show()
    return 0

if __name__ == "__main__":
    exit(main())
And the same image is generated, at the end:
Conclusions
This project is the latest, in a short series on how to use Subsquid’s indexing framework for data analytics prototyping. This article focuses on showing how Subsquid allows its users to choose where they want to store their indexed data. Most importantly, in a quest to give power to our users, I wanted to advise using a decentralized storage solution, to effectively own your data, and rest assured your data analysis can be "unstoppable".
I chose to re-use the project shown in the article about indexing to local CSV files because saving to S3 should be seen as simply a change of destination. I thought the best way to explain this was by editing an existing project, to show that, effectively, nothing changed, if not where the files were stored.
This meant I had to edit the Python script to import the remotely-stored CSVs into a Pandas DataFrame, and perform aggregation operations on this data, but this is such a common scenario, that there is a file system abstraction library to do this. I ended up not using it because I didn't know how many folders would be created, or their names, a priori, so boto3 was a better option for this scenario.
This series of articles also wants to collect feedback on these new tools that Subsquid has made available for the developer community, so if you want to express an opinion, or have suggestions, feel free to reach out.
I want to see more projects like this one, follow me on social media, and most importantly, Subsquid.
Subsquid socials: Website | Twitter | Discord | LinkedIn | Telegram | GitHub | YouTube

